The Beseda’s farmhouse style manufactured home just keeps getting more beautiful with every passing weekend. The couple’s most recent weekend remodeling adventure was an affordable DIY plywood flooring project and Ashley was kind enough to share every detail with us.
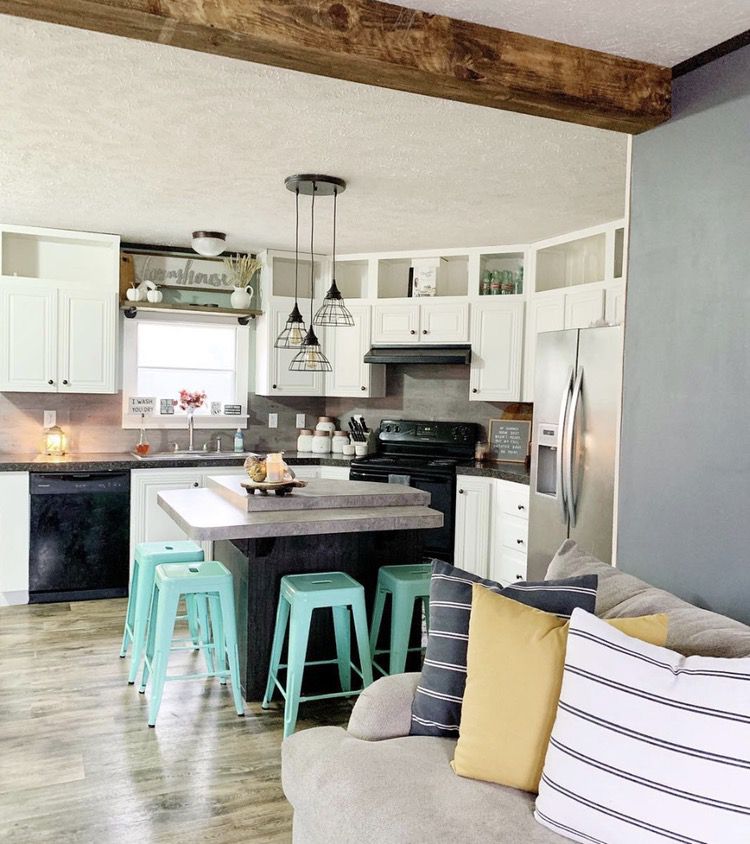
Ashley’s double wide manufactured home is a perfect example of modern farmhouse inspired decor. White shiplap walls pair perfectly with dark stained wooden ceiling beams. The farmhouse style has taken over homes across the nation since the HGTV show Fixer Upper first aired. The traditional farmhouse look is a throwback to the simple days when things were made of natural elements that gracefully weathered over time. It’s a style that embraces imperfection and that’s becoming more important as technology takes over every facet of our lives. Our appliances can talk to us now so creating a more primitive style home helps balance things out a little bit. See more awesome farmhouse style mobile homes here.
We’ll share all the details of Ashley’s DIY plywood flooring project along with tools and materials lists and expert tips to help you complete your own beautiful flooring project.
Plywood can be a beautiful and affordable floor covering. It is an especially great choice if you are going for the popular primitive farmhouse style but it can also work well for other decorating styles: casual cottage, country primitive, and even modern tradition.
Choosing the right material is the first step for a successful DIY plywood flooring project so we’ll start with a short guide to help you understand plywood.
Plywood 101
Plywood is made from several thin layers of wood that have been glued together to form a solid sheet. When it first hit the construction world, Popular Science described plywood as a layer cake of glue and lumber.
Plywood is an engineered wood but it’s a bit different from OSB, MDF, and particle board. OSB, or oriented strand board, is made from several small chips and slivers of wood that’s glued together. Particleboard and MDF are essentially made of lumber dust and glue and are often used as subflooring and cabinetry in the most affordable mobile homes.
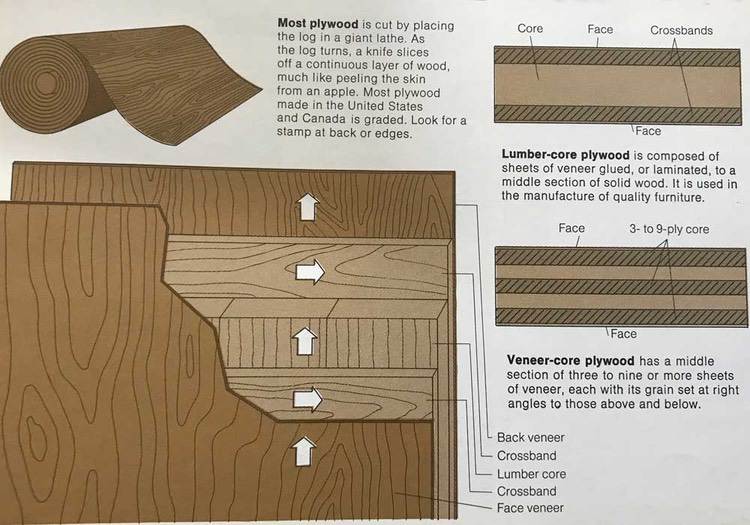
Plywood is made from a huge log placed into a lathe. As the lathe spins, a paper-thin layer, or veneer, is sliced from the log much like peeling the skin from an apple. These veneers are placed in layers of varying direction and glued together to form a strong, aesthetically pleasing panel.
Plywood Grade and Thickness
Plywood comes in two main grades and several thicknesses. There is project grade and construction grade. As you probably guessed, construction grade doesn’t have to be as uniform and ‘pretty’ so it will usually be cheaper. Construction grade is mostly used for exterior house sheathing, the paneling under roofing or siding, where it goes unseen. Project grade plywood is more uniform and, well, prettier. It will have met appearance tests that construction grade plywood couldn’t pass.
Pine plywood is softer but affordable. If you like a more worn and weathered look pine plywood is a good choice. Birch and oak plywood will hold up a bit better but they are a bit more expensive.
For that worn imperfection that the farmhouse style so perfectly embraces, pine plywood that’s been primed, painted, or whitewashed should work just fine. You can add a bit more protection by using primer and enamel paint on the plywood.
Buying Plywood
- A 4′ x 8′ sheet of pine plywood costs between $15-25.
- You can order plywood a few days in advance at both Home Depot and Lowe’s to ensure there’s plenty available to choose from. Always chose your own lumber and look for uniform panels that lay flat and have no sign of water damage.
- Most major home improvement stores offer free or low-cost cuts. For just a couple of dollars more, you can have the store cut your 4′ x 8′ plywood panels into whatever width you need. For larger rooms, you’ll probably want to go with 8″. Keep in mind that in the lumber industry measurements are not true. For example, instead of telling them you want 8″ wide planks, tell them you want the 48″ panel divided by 6 so you don’t waste any. Learn more about plywood here.

Understanding Mobile Home Floor Construction
Before you do this DIY plywood flooring project it’s important you understand that a manufactured home has a different kind of flooring construction than a site-built home. Your Mobile Home describes a mobile home’s floor as a sandwich: on the bottom is your belly wrap, in the middle is the floor joists, insulation, and ducts, and on the top is your subfloor and floor covering. It’s important that the middle of your ‘sandwich’ be insulated well and your underbelly be a solid sheeting without holes or rips. Learn about mobile home insulation here.
To install plywood flooring you need the nails to sink into the joists and nowhere else. This makes the new flooring more secure and eliminates holes in the subfloor. Laying out and cutting the planks of plywood to the correct lengths (not widths) is the most difficult parts of this DIY plywood flooring project.
Material List for DIY Plywood Flooring Project
Know How Much Plywood you Need
Tools
- Brad Nailer with 1 3/4” nail set
- Table saw
- Chalk line
- Safety goggles
- Stud finder (if needed to find the floor joists)
- Paint
- Paintbrushes and Paint Trays
Paint Brush Tips
Professional painters have shared many tricks with us over the years that may help you whitewash your plywood flooring.
For new brushes, it may help to soak them in water for a couple of hours before you dip it in the paint for the first time. Wetting the brush first makes cleanup easier and can keep the paint from soaking into the heel of the brush. You may be able to help loosen up an old stiff paint brush by soaking it in fabric softener.
The Step by Step Process for DIY Plywood Floor Project
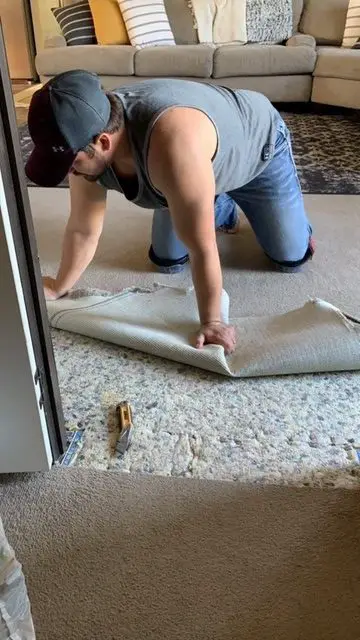
To start on their DIY plywood flooring project, the handy couple removed all the furniture from the room and then pulled up the carpet and the padding. The subfloor was all that remained.
Step 1: Removing the Carpet and Padding from the Room
Step 2: Ripping the Plywood into Planks
Once the carpet and padding were removed they planned out their layout and began ripping the panels into planks. Learn more about table saws here.

Step 3: Installing the Plywood Flooring
The planks were nailed into the joists under the subfloor.
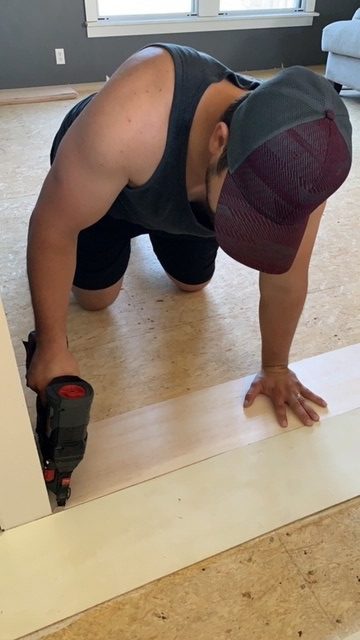
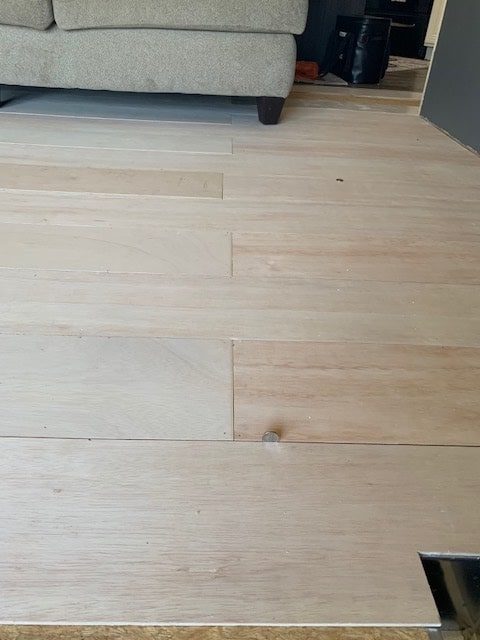
Ashley and her husband used 1 3/4” nails in an 18 gauge Brad nailer to nail down the planks. The wanted spacing between their planks to give the flooring a true farmhouse look so they used nickels as spacers.
Step 4: Ready for Paint
After the flooring was laid, it was time to whitewash the plywood. Ashley wanted her flooring to be more painted than stained so that less wood showed through. To get that, she mixed her Valspar paint a little thicker.
Ashleys used Valspar Medallion paint in Swiss Coffee.
She explained that mixing her whitewash in smaller batches worked best. If she mixed more than a couple of cups full of the water and paint mixture the paint would sink to the bottom leaving a watery top. In the video above, she shows the consistency she liked best.
She mixed 4 large spoonfuls of paint to 8 even spoonfuls of water at a time and then brushed the mixture onto the boards.
Once the floor was dry, she sealed it with Minwax Polycrylic in clear satin, following the directions on the can. She likes the product because it doesn’t yellow the floors.
The Polycrylic was left to dry and then they added base shoe trim around the room where the floor meets the walls. They painted the trim the same white they had used for the walls and the whitewash for the floors.

Conclusion
Plywood isn’t just for subfloors anymore. It’s a perfect flooring material for primitive or farmhouse styled homes because the imperfect and worn look is exactly what those styles are all about. See another double wide with farmhouse style DIY plywood flooring here.
If you follow our tips and Ashley’s step-by-step instructions you can create your own beautiful flooring for less than $200 per room. That’s a steal compared to most floor coverings!
A big thanks to Ashley and her husband for sharing her DIY farmhouse flooring project with us! You should follow her on Instagram @cottonncopper.
Do you have a plywood floor? We’d love to hear about it in the comments below! As always, thank you for reading Mobile Home Living!
Comments
10 responses to “Affordable DIY Plywood Flooring Project”
Awesome! So glad it’s a helpful article! Take lots of photos so I can feature your floor next!
Hey Pam!
I would LOVE to see your floors! It sounds genius!
I just started a Facebook group called Mobile Home Living: Remodels and Repairs where anyone can post images of remodels and get advice and help with issues. I have a FB page but it isn’t easy for others to post on. Could you post it on there and then I can add it as a flooring idea for a future article.
Thank you!
This is beautiful! I had been wondering about using plywood as my living room flooring (to start!) but had no clue what questions to ask… this answered most of them. I know my subflooring will need repairs so that will be done first… and then the upper layer of plywood on top. I’ve got two dogs and this carpeting has got. to. go! Then, when it comes time to paint, it will just be a matter of matching the color to the mud they track in… LOL
Thank you for sharing another great remodel!
I know this was posted awhile ago but thought I’d reply anyway. We lived in a hundred year old house. We had ugly brownish shag carpet that was probably 60 years old! My husband didn’t want to pull up the particle board flooring that was under it for fear there might be a big hole or something that we couldn’t afford to fix, so we drew lines on it using a 2×2 it and routed out those lines like planks and painted it all black using rust oleum painters touch in semi gloss black. It looked gorgeous and people thought it was planked flooring! It saved us a bucket load of money and took a beating from our 8 grandchildren and kept looking great! It got a few nicks but all we did was touch up the nick and you couldn’t even tell! I’ll try to post a pic. We live in a mobile home now, which we totally love and have done lots of improvements too! I just wanted to share what we did in case someone wanted another way to do it without ripping it into individual planks.
Thank you, Chuck!
I hope your neighbors know just how lucky they are to have such a kind and talented cabinet maker as you living beside them. Lucky, lucky people! (You want to move to Oak Hill, WV for a summer? My mobile home needs a new kitchen, too!) Take lots of pics for me! Thank you!!
You are always my GO -TO- PLACE for knowledge and ideas how to make our home more enjoyable and functional. I advises my neighbors to view MHL for ideas for their kitchen remodel and they got plenty. Myself and another neighbor will be doing the remodel for them starting in mid-January. For some silly reason they wanted a fully functional kitchen for the holidays. I will document the entire remodel for your consideration to post.
Always good to see a comment from you, Chuck! Means a lot that you read and support Mobile Home Living! Thank you so much!
A great article and filled with some great ideals. The end results shows what creative thinking and the willingness to “step outside ” the box when remodeling with give you – a beautiful home. With so many new home remodeling products coming to market each year – we remodelers are only limited by our imaginations on how to use them – great job homeowners.
Hi Eva!
I know I didn’t explain that very well. Apologies! So, if your joists are going left to right your flooring/planks will be going up and down (90 degrees from the joists). Your crosswise joists will have lengthwise flooring. The end of one plank will meet the new plank on top of the joists so each joist will be nailed at each end and in the middle if needed. It’s not the end of the world if you miss a joist but every effort should be made to get all the nails in joists to keep the flooring from squeaking and reduce the number of holes in the subfloor (which can create air leaks).
The perimeter of the room may or may not have a ‘lip’ around it but if you are installing new subfloors it’s usually necessary to add a 2×4 or 2×6 around the perimeter of the room (under the wall) to give the subfloor something to lay on and be nailed into. Ideally, you’ll straddle the planks over the marriage line.
Looks gorgeous! I’m a bit confused, it says nail in to joist only and around the perimeter but what about everywhere else? Each piece of plank should be nailed down in my opinion? When it says joist is that the same as the marriage line?