
Let’s face it, anyone who has enough money, or who doesn’t mind getting deeper in debt, can turn an old, tired, mobile home into a beautiful place by simply gutting it and installing all new everything. That is not what we did and frankly, that is not who we are. We wanted to enhance and restore as much of what was already there as possible, and to use what we already had in the way of furnishings. This type of renovation takes a lot of planning and a lot of late nights laying in bed and visualizing all the possibilities.
Of course, this type of renovation requires a great deal more creativity, ingenuity, and hard work then the “gut and replace” remodel; and yet, it is so much more rewarding. Why? Primarily because the end result will be a less expensive; one-of-a-kind, living space, like no other, rather than a cookie cutter, model home. It will simply have more character and, I believe, be so much more beautiful, interesting and functional.
STEP ONE – ANALYSIS
The key to a successful mobile home remodel DIY project is analysis. When you take the time to really analyze the space before any work begins you will save time, money, and aggravation.
We began by measuring all the rooms and all the space within each room and taking pictures of just about every angle of every room and every space within each room; printing out those pictures and writing the dimensions onto the black and white print-outs.
Part of the continued analysis was to take measurements of all of our existing furniture in order to determine where it would fit. In a small home, there are very few options and we did not want to finish renovating only to discover that half of our furniture was not going to work—or spending a weekend moving furniture around 359 times until something worked out. A “to scale” floor plan was created for each room with “to scale” furniture pieces. As a result of this analysis, we realized that if we were going to be able to keep and use our three 7 foot high oak bookcases, we would need to close off and panel over windows in the living room.
STEP TWO – THINK ESSENTIALS
This is where the scaling down takes place. Decide what is absolutely essential and also what you can live without. What do you really need to enjoy a living space? What is practical, functional and comfortable? We have all been in homes where things look wonderful; but, living in the space simply doesn’t work. It’s not functional.
Also, decide what you can salvage and use for something else or somewhere else—shelves, mirrors, curtain rods, hardware, doors, etc.
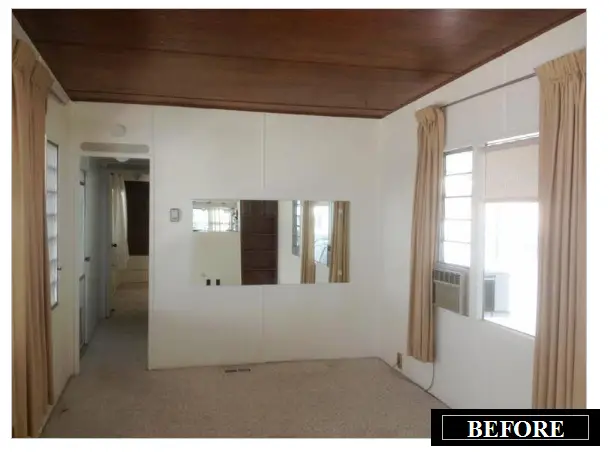
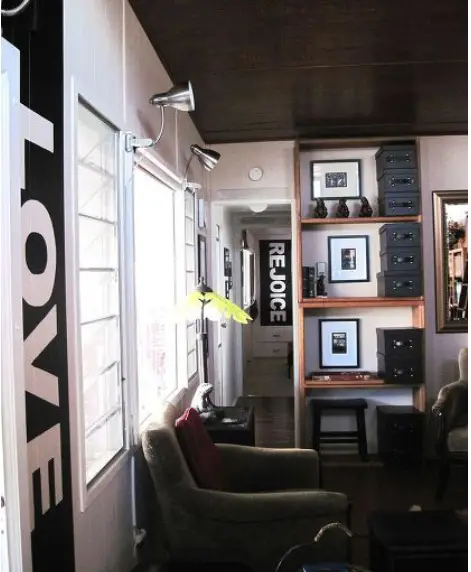
We had three huge solid oak bookcases and a solid oak desk that we needed to fit into this space. Therefore, after removing the mirror, the window covering and hardware, we also sealed and closed off the windows on the carport side. In small spaces, going up for storage is always the solution and it can add a great deal of interest to a room.
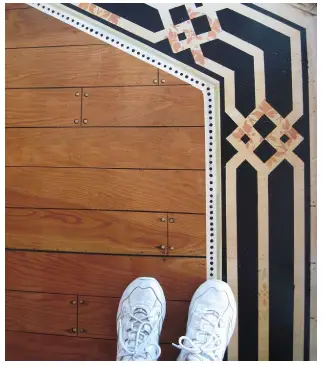 We used our existing clip-on desk lights for lighting above the other window and created a built-in library space on the entire carport side wall. The biggest project in this room was pulling the carpet and hand painting the plywood sub-flooring.
Details of that project can be found here: http://www.hometalk.com/3482198/a-1964-single-wide-make-over-hand-painted-sub-flooring
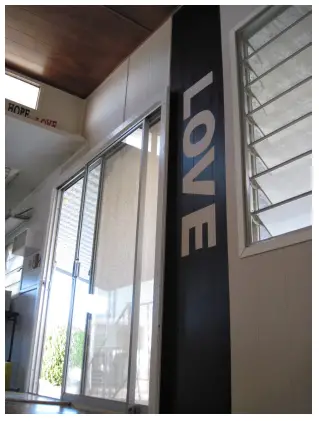
As I looked around the space, I knew I needed something bold and tall on the other side of the room to balance the space and yet had no room for additional furniture so I decided to use paint! That is where the “Word” theme started and what ultimately set the theme for the home.

KITCHEN BEFORE:
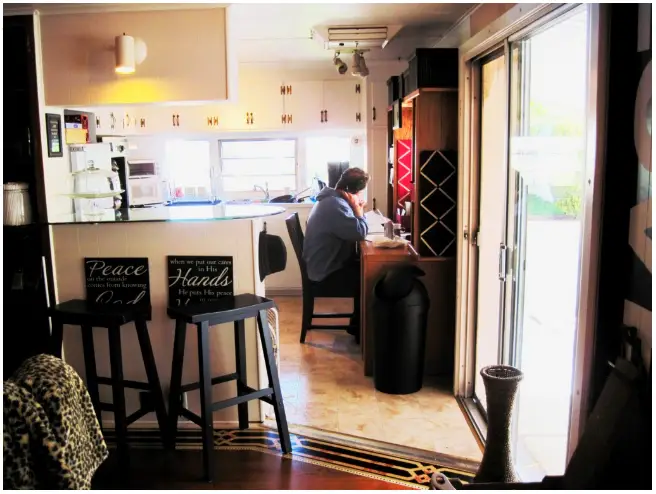
Challenges here included a 50-year-old Wedgewood built-in oven that was no longer (safely) functional and the space for it was too small for a new built-in oven to be installed; the range top also had to go, simply because it had died. In addition, there was no room for a kitchen table and the light fixtures were old and the light switches were worn out. But, we could live with everything else: the original cabinets, sink, counter, and vinyl flooring. So, we concentrated on what we needed to add and how to best use the space, functionally.
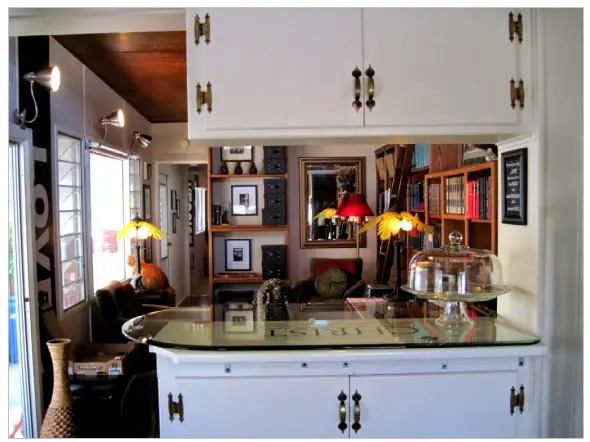
First, we took apart a solid oak corner desk with hutch and used all the pieces to build a desk and hutch around the existing kitchen window utilizing the different sections of the corner unit. We created a breakfast bar using the glass top from an old Scandinavian coffee table that someone had discarded at the side of a dumpster, by mounting it to the skinny existing split counter and adding two bar stools. We also replaced the range top and the light fixtures and of course a fresh coat of paint.

BEFORE
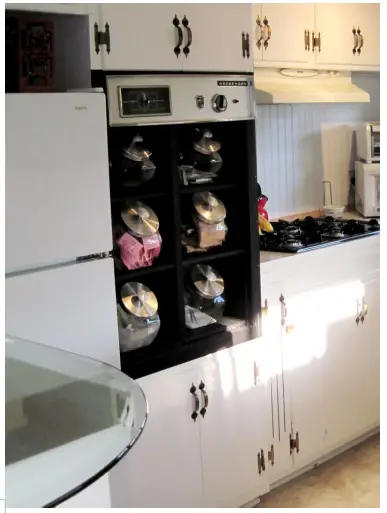
I remounted the oven top above the cubby holes to retain the retro feel and used the cubby holes for my very functional glass jars. It broke my heart to have to pull that Wedgewood.
The new light fixtures were a splurge. It was tough spending $99 a piece – But it was made easier after we received a gift card for Lowe’s as a housewarming gift and I won another Lowe’s gift card at a luncheon. Are these perfect or what?
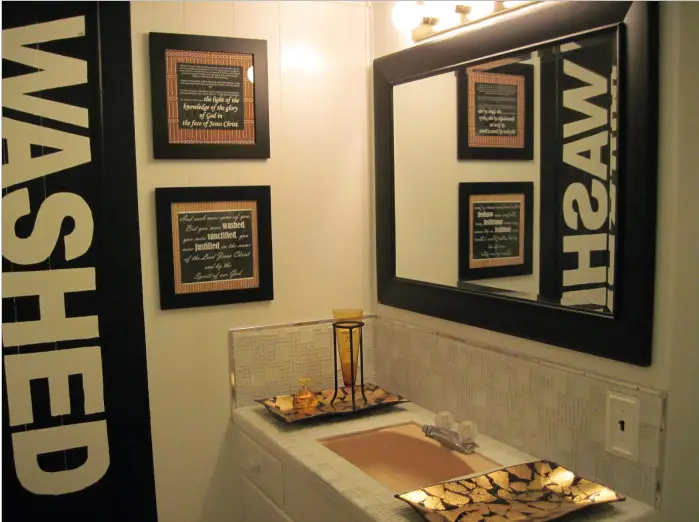
BATHROOM
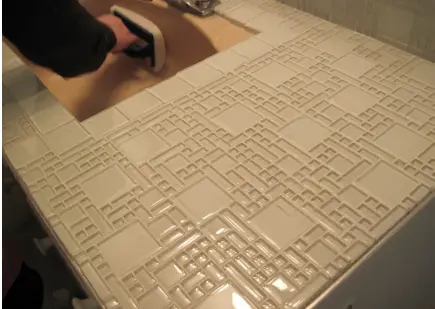
This room was the biggest challenge. I hated the color of the sink and the tub and the apricot had to go! The tub was a disaster and the shower didn’t work. I removed all the mirrors (there were three) stripped the trim, primed and painted and then tiled the backsplash and the countertops with glass mosaic tile.

I was able to tie in the sink color with the bamboo matted pictures and the woven baskets. Phew! That was a total relieve since we really could not afford a new sink and bathtub. We were really trying to retain everything that was functional.
We had a black framed mirror that had hung in our apartment that was the perfect size for a “new vanity mirror.
Details of the entire mobile home bathroom renovation can be found here: http://www.hometalk.com/3527587/ma-am-your-escutcheons-are-bent-and-upside-down-i-beg-your-pardon
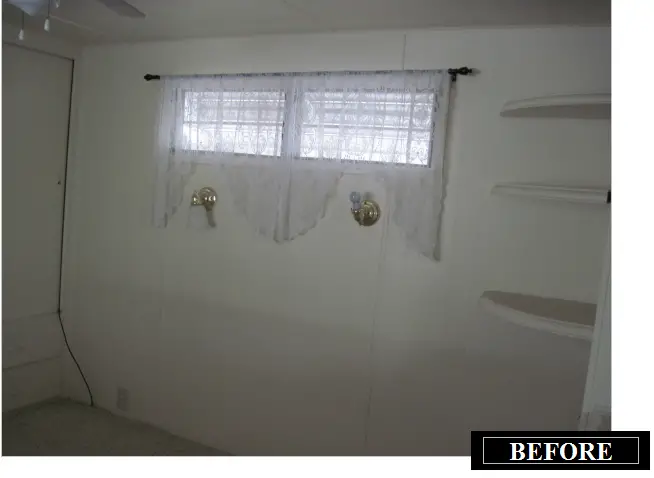
BEDROOM BEFORE
Let me start out by saying “People who paint over drawer pulls and cabinet hardware should be shot!” Yes, the hardware had been painted over not once—not twice, but three times and there were 29 pieces not to mention the original copper screws. Can you imagine the cost of replacing all this hardware—even at Home Depot?

So, we spent 5 hours stripping the hardware and look what we found underneath all those layers of paint.
The real bonus was the great built-in’s—all solid hardwood and in great condition. The only furniture necessary in this room would be our bed—which is a good thing since the room was only 10’ X11’. Again the key was going up for storage. I used 4 corner units that we already had and mounted them from the ceiling to the wall on both sides of the bed. I also was able to use the little white boxes that were originally mounted on either side of the kitchen window.
Picture frames were used as window coverings and of course, carried the “WORD” theme into the bedroom as well.

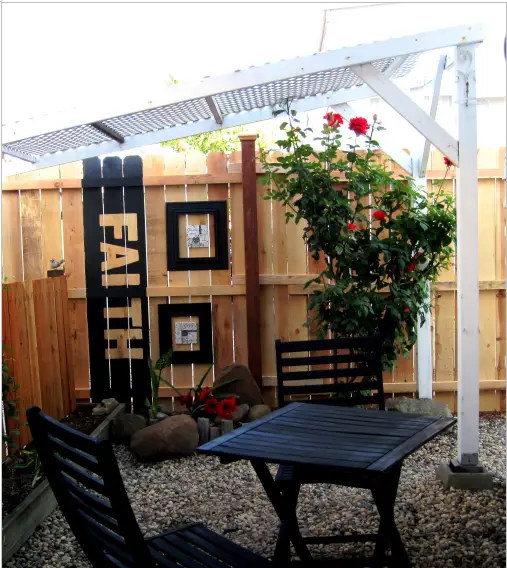
GARDEN
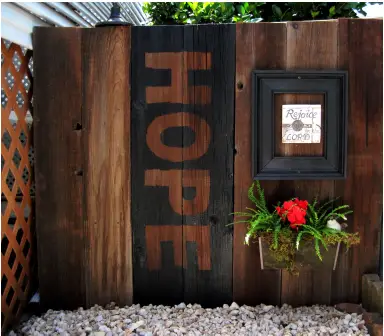
We also decided to carry the “Word” theme out into the garden and still have more work to do on the patio. But, all and all, after two months it is finally livable!
Conclusion
Our desire in sharing with the reader is with the hope of inspiring others to enhance what is already there and use what you all ready have—those who want to think creatively about the existing space; and their “stuff” and how to merge the two into something that is uniquely theirs that is affordable, beautiful, and functional.
Now, give up that mansion, find a cute little single wide mobile home, and get busy!
Happy Mobile Home Living!
My contact information:
FACEBOOK: https://www.facebook.com/pages/Wear-the-WORD/412263378821782
PINTEREST: http://www.pinterest.com/theologyart/
My Etsy Shop: www.thewoodssecretgarden.etsy.com
My Blog: www.thewoodssecretgarden.blogspot.com
HI Dianna- Just saw this story and am in love. My husband and I are currently remodeling a manufactured home and would love to incorporate some of the word graphics. I wondered how you achieved the perfect lettering.
Great Project! One question… you now have no oven?
Your home is so cute! I just love it.
So many great ideas. One that really resonates with me is the art work s window treatments. I have a great wall display along my wall at the head of my bed. I had to put the head board off center of the window and thought that some picture that fit over it would work. Never did it. Now, I see that I could use more than one, and they could move. Thanks for posting your remodel. I’ll use a lot of the ideas.
So glad our projects helped to inspire you! Thanks also for taking the time to let us know! It’s always encouraging to hear from folks.
the idea of creating the bench and using it for storage and also “day bed” I would call it was incredible! I am limited for space, have a 16×80, so I think I’ll create me a “bench”LOL.
Thanks Lou Ann for your encouraging words and great ideas!
Thank you so much for publishing your ideas. I am planning to buy a mobile home in the near future and I plan to buy an older used model like you did. I have been collecting things for years to use in the home as far as decorating and the one thing I was going to do was to block one side of the living room windows to be able to use that wall. I had planned to use a wall mural and create a fake window effect. Now I am thinking of blocking both sides of the living room windows since there is nothing to see but the neighbors and put a mural on one side and library on the other. I also love the tea making area since I am a tea drinker.
I do have a suggestion which I am using. I have an old tv set and wanted a place to put it where it blended into the furniture and I had a small room. One day I asked myself what did I have that I could use and I was staring at my four 6′ bookcases that have a cardboard backing. I cut a hole on the back of the bookcase so that the back of the tv would stick out of it and with four bookcases put together all the wiring is hidden from view. Recently I wanted a fireplace, but again I have a small room and really no space except for 24″ between 4 bookcases and came up with a solution. I had 2 plastic filing cabinets that were black and my bookcases are black. So I simply used one of them and turned it sized ways to fill the spot. Placed 4 black poster boards across the space to make it look like it was part of the bookcase unit and bought electric logs and some inexpensive cork. I put the cork down on the plastic bookcase to protect it from the heat of the light bulb in the fake logs, put the logs on the black filing cabinet, put art work above it and there is a whole wall unit with fireplace and tv, People think my fireplace is real.
I love taking an old place and making it new again with what you have and your imagination, because seriously most people are financially struggling right now and most people can’t shell out money to decorate, so you have to use your imagination and the things you have or can get and go for it and see what you can create.
Again thanks so much for your ideas. There are not many ideas for decorating mobile homes on a dime so to speak on the net so keep it up.
That’s super cute but didn’t y’all have to rewire it? I have a 1965 single wide and it has aluminum wiring in it (never seen a trailer before the 70’s that didn’t have aluminum wiring) so if I decide to remodel it I’ll probably have to strip it down to the studs. It also doesn’t have any sheathing and it’s built with 1×3’s instead of 2×4’s. It’s built like a travel trailer but it’s a fire hazard because of the wiring. So if y’all did any structural improvements to your home or rewired it it’d be helpful to know how y’all did it:).
Hi Natalie – The cool thing about this mobile home, is that in it’s time it was top of the line. Hard wood everywhere. No particle board or pressed board and copper wiring throughout! My mom’s 1965 had aluminum and we had it pigtailed with copper at every switch, outlet and socket – which seems to be a cheaper solution if you hire the right electrician.
LOVE LOVE LOVE!! You did such a great job here 🙂
Hi Liz – Great to hear from you. Thanks for popping in from hometalk.com
Wow!! This was very inspiring!! I loved the post on the painted floor. 🙂
Thank you for taking before and after photos as well as in progress.
Thanks Jeni! Yep, that painted floor even blows my mind and I’m the one who did it! Isn’t that great when that happens. I really think that anyone can do something like this, especially with the step-by-step instructions. I am the kind that learns by doing and have never regretted experimenting, even when it didn’t come out as well as I wanted it to – the stuff I learned in the process was always well worth the disaster.