Pam, our wonderful new MHL contributor and fellow mobile homeowner, shares her beautiful budget-friendly mobile home kitchen makeover. You can see her kitchen backsplash tile board makeover here and her kitchen ceiling fan makeover here.
When we moved into our 1975 Single Wide Marshfield Mobile Home, the previous owners had already made some upgrades in the kitchen. The appliances were all pretty new (Yay!), but there were problems with other work they’d done.
Budget-Friendly Mobile Home Kitchen Makeover
Replacing the Sink and Faucet
The kitchen faucet was horrible (plastic), it wobbled and it leaked. The sink was of low quality, dented Stainless Steel model. It was also not leveled properly. It turns out, the hole in the Formica top hadn’t been properly cut to size.

My husband, a retired plumber, has always been a “Moen Man” when it comes to faucets. We found a reasonably priced Moen faucet at Home Depot.

The kitchen sink was replaced with a Franke Composite double bowl sink. I ruled out getting a porcelain sink because they chip and stain. I will never have an acrylic sink again, it scratched and stained horribly. I’d always liked stainless steel, but decided to try a Composite. I really like this sink. It’s attractive, doesn’t stain, is tough and
I like the wide apron at the back.
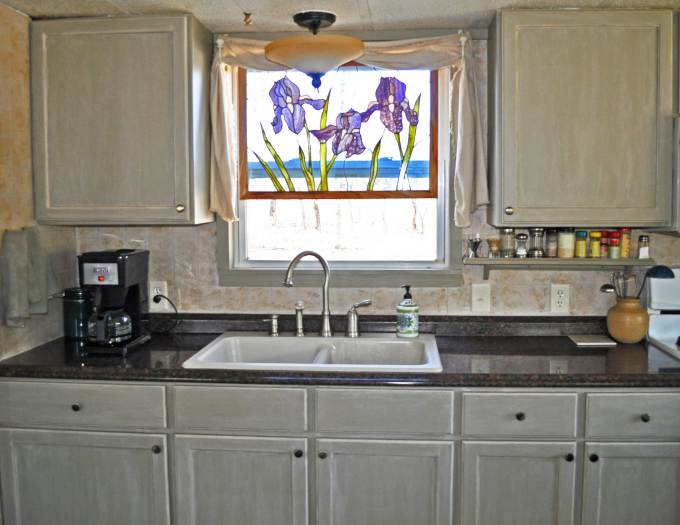
The ‘Granite-Look’ Formica countertop was new, and a keeper. The backsplash however needed help. You can read about my backsplash makeover here.
Budget-Friendly Mobile Home Kitchen Makeover – Laminate Floating Flooring
The existing floor (installed by the previous owner) was the world’s cheapest laminate. It was shiny and slippery.
While in my stocking feet, I’d already slipped a couple of times. When I actually fell on my keester, that was it…the floor had to go. (At my age, I’m thinking…broken hip!)
We chose Lowe’s Allen Roth Collection wood laminate. This product was affordable (we did the entire house for about $800) and easy to work with. A big plus is that the planks already have foam backing attached.
Most laminate floating floors require an underlayment of foam between the subfloor and the laminate floor. If you have to buy the rolls of foam separately, it adds significantly to the cost of the project.
Related: Flooring Options for Mobile Homes
Formaldehyde Emissions
Thank goodness I’d done my homework when researching my flooring options in early 2014. I saw a lot of consumer complaints online about some of the very products I’d been considering.
Folks complained about awful, sickening chemical smells from their newly installed floors….some were so bad that they ended up ripping out their brand new floors! The Allen Roth flooring did not have that problem with excessive amounts of formaldehyde in the product.
Related: Learn about Formaldehyde emissions in home improvement.
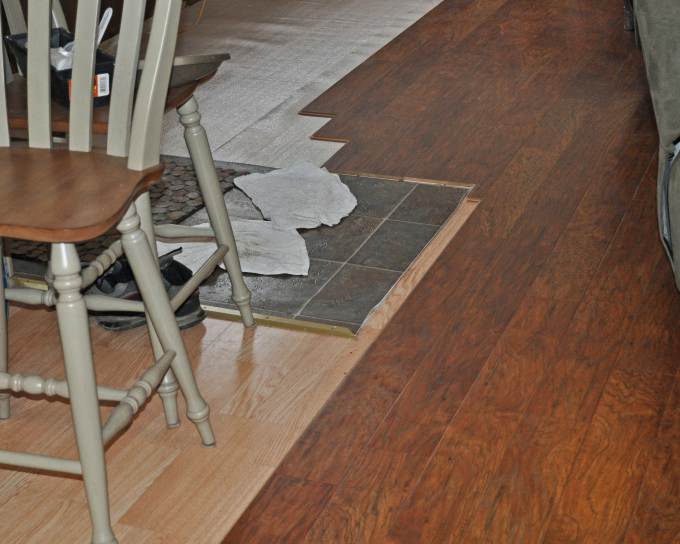
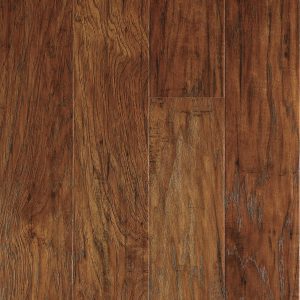
You can see the old flooring on the left, and the new on the right. The foam in the upper left corner is left over from the old flooring that we tore up. The color and style is Marcona Hickory.
Related: How to Install Laminate Flooring (Lowe’s Guide)
Budget-Friendly Mobile Home Kitchen Makeover – Cabinet Makeover
The kitchen cabinets were relatively new and in pretty good shape. They were, however, an inexpensive, unfinished ‘big box’ item that the previous owner had finished himself. Unfortunately, he didn’t do a very good job.
The stain color was a bit too orange for my liking. The really big problem was that he’d polyurethaned OVER steel wool residue, leaving black splotches that looked like dirt or mold. And of course, there was no way to wash that away.
Fortunately, I liked the configuration and chose not to change that.

In this photo, you can see the black residue, especially along the top inset in the door.
My husband and I brainstormed for a year about what to do about those cabinets. We thought about replacing the doors – too expensive. I just didn’t want to spend a lot of money on cabinets when these were perfectly serviceable so we decided on paint.
How to Paint Your Kitchen Cabinets
I chose to do a cottage/farmhouse look with satin paint and glazing. This treatment would hide the imperfections in the doors. Had I chosen a glossy or enamel finish it would have shown every imperfection.
The Sanding Conundrum
The polyurethane on the cabinets was pretty thick. I just didn’t have the energy or ambition to sand down to raw wood, and the central panels on the doors were awfully thin to begin with. I chose to do a good scrubbing with Dirtex, do a light sanding to roughen the surface a bit, and use a super bonding primer. Zinzeer 123 primer had done a good job for me on other projects, and I felt pretty confident.
Still, I kept my fingers crossed!
Painting Kitchen Cabinets
The doors were removed, prepped and primed (two coats) – as were the frames. Next, I painted the doors and frames with two coats of Valspar “Churchill Downs” latex paint in a satin finish.
I chose the color to match my kitchen table/island. I also painted all of the window trim in this same color.
After this base coat had dried overnight, I applied the glaze.
I used Ace “Artistic Finishes for Faux Painting”. A peachy/beige color paint (Ace Royal “Stagecoach”) was added to the clear glaze.
Using a foam brush, I applied the glaze around the edges, working it into the corners of the inlays. This was done to get more pigment into those areas. When applying the glaze, do small areas at a time, wiping the glaze down with a damp rag before it dries completely. A bristle brush was used to glaze the flat areas of the doors and the frames.
Time & Money Spent on Kitchen Cabinet Makeover
The project took about 5 days, working on and off.
Cost of the painting project; including paint, glaze, brushes, rollers and drop cloth was around $150.
Sink and faucet; around $400.
I painted the cabinets in early February 2015, 1 year and 2 months ago. I’ve had no problems with chipping or peeling. I’m also happy with how nicely they clean up with warm soapy water……and now I like the way they look.
Before
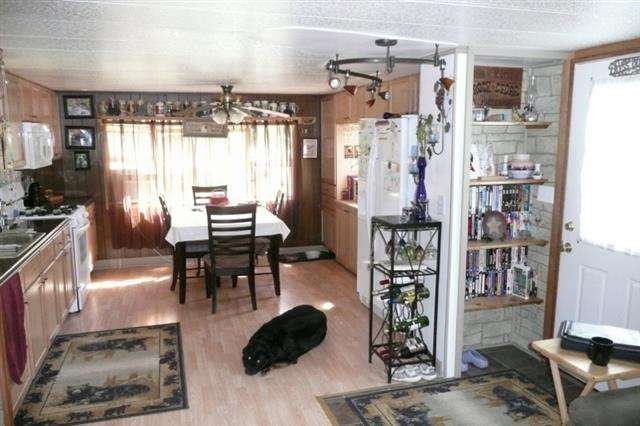
The above “Before” photo is from the Real Estate Listing when we bought the house.
After

Above is an“After” Photo from the same angle.
We did remove a set of 10” wide cabinets (useless) that were to the right of the fridge and that allowed us to deepen the ‘cubby’ and make an entryway closet.

The other side of the kitchen. The stained glass is quite old and from my grandpa….it must be displayed in all of my homes.
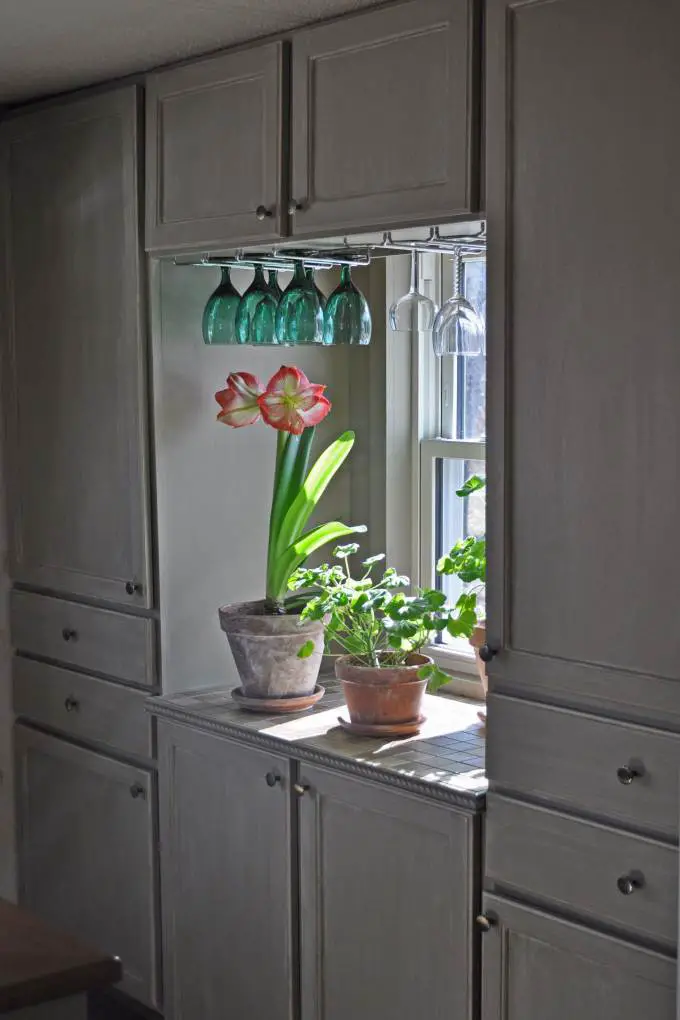
Just my pretty Amaryllis.
Thank you so much for reading about Pam’s Budget-Friendly Mobile Home Kitchen Makeover on Mobile Home Living!

Love your kitchen. It looks so bright and inviting. Great idea on putting a moveable island. We can never have too much counter area.
Great job, Pam!
I especially like that you created a storage “closet” where there were only shelves.
Great advice on the Zinzeer and the glaze.
Tall Bearded Iris: my favorite flower!
“…the previous owner had finished himself. Unfortunately, he didn’t do a very good job.” I bet we all feel your pain!
Hello Pam, thank you for sharing this. Your kitchen is lovely! I love seeing budget reno ideas. And the stained glass window that you take everywhere to keep your Grandfather close, is beautiful. I bet your house is filled with love!
Pam, I love what you did with your kitchen! Cabinets look great!
Thanks Judy, I was so happy when the cabinets turned out alright. I wasn’t absolutely sure about it when I started if it would work. So far, so good. Thanks for reading MMHL. Are you the Judy with the shiplap ceiling and walls? If so, good job!!!
Hi Marie, thanks for the kind words. I know what you mean about ‘budget’ ideas. If I had plenty of funds, I wouldn’t be painting my cabinets. However, I do get a sense of self-satisfaction when I have to figure out a way to improve things without spending a bundle. It’s a creative challenge that I find invigorating. Thanks for reading MMHL.
Hi Suzanne, thanks for reading MMHL. When we took out the useless cabinets behind that ‘cubby’, we were able to make it deep enough for a closet bar, and we can hang coats etc. in there. Also, room for the broom and vacuum cleaner. A bonus bit of space in a single wide is always welcomed. My grandpa was a flower grower for the florist trade during the depression up until the ’50’s. He grew gladiolus and iris.
Hi Sandy. When we bought this house, we didn’t have a kitchen table (having sold our old set when we moved). My old kitchen had lots of counter space, and this house doesn’t. When we went to buy a table, I opted for a tall table with the bar stool height chairs (the chairs are not in the photo), so that it could double as an island and extra waist-height work space. I’m really happy with the choice. The table has a leaf and opens to a pretty large table, although, I’ve never used it.
I love what you did. Was the frame of the cabinets veneer or real wood? I am thinking of painting our kitchen cabinets but only the doors and drawer fronts are real wood – the rest is veneer.
Carrie, the cabinets are wood. Those inner rectangles on the doors are wood, but very, very thin. That’s one of the reasons I was reluctant to do too much sanding. Good luck, and thanks for reading MMHL. — Pam
P.S. to Carrie….if you look in Pinterest under painting wood veneer, there are a lot of tips.
This is so pretty! What a great job. I love it.
Hopefully, I will have the courage to redo my cabinets like you did. Thanks for all of the detail
Pam,
I have the same Marcona Hickory floor in a couple of rooms. However, I’m a box short for a yet to be installed room. Would you have an extra box you would be willing to sell?
No, sorry I don’t
Please let me know if your composite sink is mobile home size 33 x 19, or if you chose a standard size kitchen sink? I cannot find any single basin deep sinks with 19”W. I only found an acrylic sink but it wasnt deep at all (less than 6) and everyone say they stink so Took it back. I’ve searched for four weeks every manufacturer and cant find this width in top mount deep sink. Please let me know
Hi Cheryl,
I’m sorry, we don’t sell anything at all. Have you looked at Mobile Home Parts Store?
She wasn’t asking if you had a sink for sale. She was asking if the sink you used was 33″ x 19″ or if you were able to install a sink larger than 19″ with no problems?