Need cheap backsplash ideas? Have laminated tileboard paneling in your home that you’d like to update? Here’s how painting tileboard panels can give your room a fresh new look!
What is Tileboard?
Tileboard is an affordable and widely available in most home improvement stores. It’s made of high-density fiberboard with a shiny plastic-like coating (laminated). The panels are usually 4′ wide by 8′ long and are typically made to represent a cluster of 4″ tile.
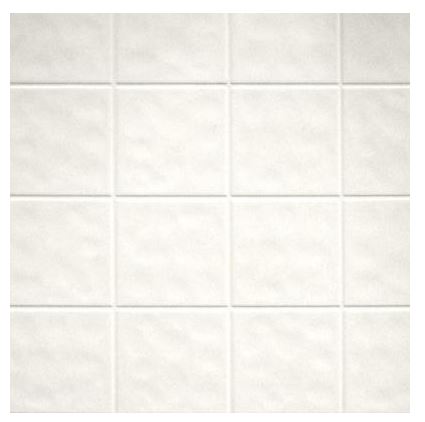
Tileboard is used in a wide variety of places such as bathrooms, kitchens, hallways, mudrooms, and entryways.
Related: Tileboard: Fast-Install Substitute For Real Ceramic Tile
Tileboard is not real ceramic or porcelain tile. It is medium density fiberboard (MDF) pressed board with a hard melamine layer on top.
The melamine top is grooved to give the appearance of tile’s grout lines. One popular tileboard is Georgia Pacific’s Lionite® Tileboard. – Lee Wallender
Note: Lowe’s calls their tileboard Fashionwall and Home Depot calls theirs Aquatile.
If you need a lightweight, waterproof, and easy-to-install and clean wall covering tileboard is a good choice. For less than $25-30 per sheet (around .79 cents per square foot), you can have the look of tile without the fuss of grouting and installing each tile one-by-one. Here are two rooms with tileboard:

The biggest problem with tileboard is their limited style choices. There’s usually only a handful of patterns available but with the right products and know-how, you can easily update them with paint.
Here’s how our feature contributor, Pam Willis, updated the tileboard backsplash in her kitchen. The previous owner had installed the tileboard paneling and she found a way to update it to better match her decor.

Cheap Backsplash Ideas – Painting Tileboard
When we moved into our 1975 Marshfield Single wide, the previous owner had made some upgrades in the kitchen but I wasn’t at all happy with the backsplash or the finish on the cabinets. It took me a little over one year to decide what to do with the kitchen.

The backsplash, which ran the entire length of the kitchen was made of plastic laminate tileboard. It was white, with some gray swirls (to look like marble?) and fake grout lines. The board was very shiny, and I didn’t like the way light bounced off of it.
Replacing the entire backsplash would have cost more than I was willing to spend. It would also require the removal of all the cabinets along an entire wall, which I was very reluctant to do.
I’d already done a lot of faux painting in my previous home, and after some research on the internet decided I would try painting the backsplash; I’d just take the leap and do it!
Painting Tileboard to Look Like Real Stone Tile
The goal was to make it look more like stone tile, to reduce some of the reflective qualities, and make it blend with what I had in mind for the cabinet paint.
Step 1 – Cleaning and Sanding
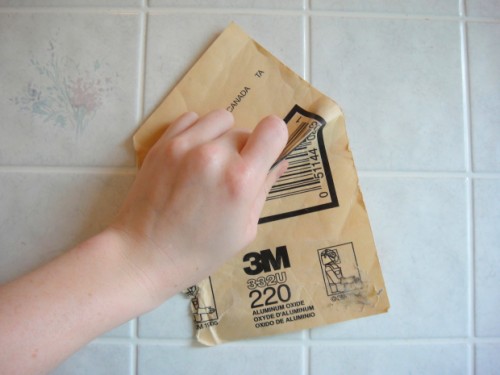
I thoroughly cleaned the tileboard with Dirtex then lightly sanded with rough sandpaper.

Step 2 – Priming
I painted the entire backsplash with a Super Adhering Primer. I used Zinzeer 123. There are other brands on the market that are quite good. When choosing a brand of Primer, always choose a ‘Super Adhering’ product when painting a laminated surface.

Step 3 – Painting
Next, I painted the entire surface with my chosen base color. In this instance, I used Ace Royal Latex in a satin finish. The color was Stagecoach, it’s also the color that I planned on using for the glaze when repainting my cabinets.

Step 4 – Glazing
I applied the glazes last. Glaze can be applied using a variety of tools: brushes, rags, sponges etc., depending on the look that you want.
Apply each glaze, let it sit for 30-60 seconds then gently wipe with a wet rag. I used 3 layers of pigmented glazes, hoping to achieve a look of tumbled stone tile.
The first layer was applied by dabbing with a natural sponge, a greenish beige (Valspar’s Churchill Downs), which was to also be the base color of the cabinets.
Related: These products were also used in Pam’s ceiling fan facelift project here.
The second glaze, Pecan, was applied using a small artist’s brush, making small swirls.

The third glaze was a very light grey over the entire project. This last glaze was applied to soften the look and give it that chalky tumbled stone feel.
Lastly, using a small artist’s brush, I painted in the ‘grout lines’ with a stronger pigment of gray mixed with glaze.
Summary: Time, Cost, and End Results
The entire project took 3 days, allowing the various layers to dry thoroughly. I would estimate the cost of the project at less than $50, much cheaper and easier than replacing the entire backsplash.
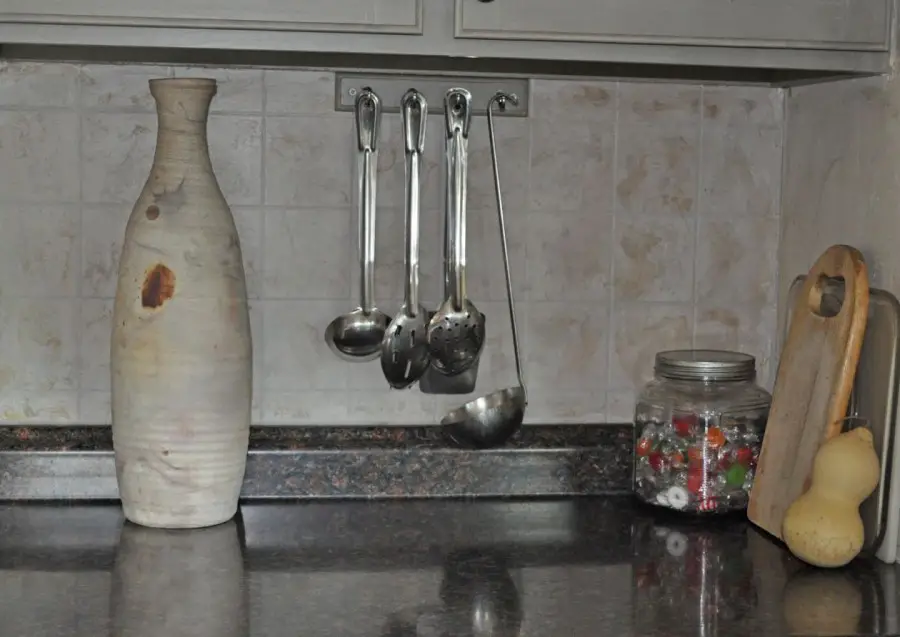
The end results!
Over-glazing the entire backsplash did a good job of sealing the paint and making it quite washable. It’s been a little over one year since I painted this backsplash and it’s holding up well. I’ve had NO problems with chipping or peeling.
Another Blogger Paints the Tileboard in Her Bathroom
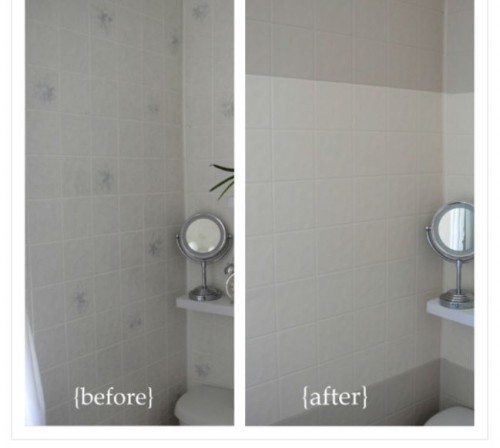
Shannon Wells, a DIY enthusiast, and blogger at So Pretty Is As Pretty Does also painted her tileboard. She did the same steps as Pam and had similar results.
This is a photo of her sanding the tileboard panel after cleaning it and before painting:
Here are Shannon’s beginning and end result, with a modern gray strip:
Here are more articles about painting tileboard:
How to Paint Plastic Tile Paneling
Paint Over Tileboard Panels (forum Q and A)
How to Paint Plastic Wall Tile
Thanks so much for reading Mobile Home Living!
Do you have a great mobile home makeover project? We’d love to share it, contact us in the comments below!

Love these tips! Your project turned out great! I am all about doing things yourself and working with what you have! I am a stay at home mom (of 3 boys) and live by the rule “work with what you have (beautifully)!”
Hi Pam….Would love to see more pictures of your home. My husband and I sold our big house and are looking for an older single wide that we can make our own. I am wanting a front kitchen like it looks like you have, that is very important to me. So, if you feel like sharing more of your style and your home, I would love to see it. Thank you for sharing about the tile board. Yours looks fabulous!!
I would like to replace the original cabinet in my single wide home; 1997 Fleetwood. My friend is re-doing her kitchen and giving me all of her cabinets…she has some of the coolest real wood. lazy suzan. I would like to know pulling out the original ones that are practically paneling material. Do I have to sand them down before installing them? I would have to adjust some of the sizes but willing to have real wood vs panel. she is also giving me her laminate countertops that are in excellent conditions. Thoughts please!!!
Looks like a really nice job Pam.
If you like the way the cabinet look that your friend gave you you shouldn’t have to sand them at all but if you plan on re-staining or painting them anytime soon may be best to do it before you install them on the wall.
Best of luck!
Thanks, Joe. I was pleasantly surprised with the outcome. When I started, I wasn’t sure if it would work. It turned out pretty well, and was a heck of a lot cheaper than replacing the backsplash. Also, I had a lot of fun doing it, not to mention a certain sense of pride in my own achievement. Thanks for reading MHL.
Hi Pamela, thank you for your kind words. Keep reading MHL, I have more articles on the way. Ours is a ’75 Marshfield 14 X 60 (I misspoke in my bio, it’s actually 840 SF, not 864…opps). The kitchen is at the front with a ‘bay’ window (which my orchids love). It’s opens right into the living area. As far as style, I am a huge fan of the Doc Martin show (BBC) which takes place in Cornwall, UK. I fell in love with the cottages as depicted on the show…and guess what, they are long, narrow and have low ceilings…sound familiar? I spent a lot of time on Pinterest looking at pics of Cornish Cottages (which I found a bit too fussy as it turns out). I started looking at Scandanavian (too stark), so I combined elements from both styles to suit myself.
With the small space, and rooms flowing into one another, I kept the colors neutral and calm. I feel it makes the space look larger. Also, keeping elements of both rooms (kitchen and living room) in harmony with one another is easier on my eye.
I’m having a blast remodeling this home. Since we are on a shoestring budget, I have to get creative with my solutions….which is really a lot of fun.
Hi Holly, Thanks for reading MHL, I’m glad you liked the article. Hubby and I are seniors (and hubby is disabled) and we have to work within a very strict budget. I find the creative challenge of how to solve a design or decorating problem within that budget to be very self satisfying. Good Luck to you, and the boys.
Thanks so much for sharing! And, Pam – I love how your backsplash turned out!