Tag: Floors Walls and Ceilings

  • Top 3 Methods to Insulate Under a Mobile Home

    If you insulate under a mobile home you can save money. Over the last 3 decades, the National Renewable Energy Laboratory (NREL) has partnered with the US Department of Energy to test various methods of energy efficiency for old and new manufactured homes. Adding better insulation to the walls reduced heat loss by 13%. Coming in a close second was adding better insulation to the underbelly, under the sub-floor but above the belly wrap. It reduced heat loss by 11%. Installing storm windows also decreased heat-loss by 11%.

    As with most everything involving mobile homes, there is confusion surrounding the mobile home underbelly or crawlspace under the home. One reason for the confusion is the numerous names used to describe the same thing. Mobile home belly board is also called a mobile home belly wrap, underbelly, bottom wrap, bottom board, belly, and belly barrier. Regardless of the word you use, it needs to be well-insulated.

    In this article, we cover the best materials and method to insulate under a mobile home. We also share how one couple insulated and repaired their own mobile home underbelly using foam board.

    Blowing Insulation into the Belly of your Mobile Home

    As we shared in our complete mobile home insulation guide, blowing insulation into the belly and the ceiling of a mobile home is the most recommended method to insulate under a mobile home.

    However, this method of insulating a mobile home underbelly requires specialized equipment and advanced knowledge of a mobile home’s construction. Therefore, blowing insulation can be expensive. Fortunately, there are many state and local government programs that may help mobile home owners to add insulation via energy grants and low-interest loans.

    Depending on your location you may qualify for a program or financing help to get your mobile home insulated better, especially if it was built before 1976.

    Top Materials to Insulate Under a Mobile Home

    While blown insulation is the favorite method of insulating a mobile home underbelly it is also expensive because you have to hire it out. Using foam, fiberglass, or Rockwool panels gives the homeowner the opportunity to DIY which is usually always a cheaper option.

    Spray Foam

    Spray foam is most recommended for already enclosed areas such as the walls or ceiling/roofing of a mobile home. It’s fairly expensive because you have to have special equipment.

    Spray insulation can be made of a variety of materials. Most common is cellulose (newspaper), foam, and fiberglass. Learn more about spray foam here and here.

    Advantages of Foam Insulation 

    Foam insulation has many advantages. Here are just a few:

    • easy to cut with a utility knife, hand saw, or table saw
    • lightweight and easy to carry
    • flexible enough to easily maneuver into tight spaces – DIY friendly
    • doesn’t promote mold growth
    • water resistant
    • long-lasting – won’t decay
    • insecticide is used on most foam making

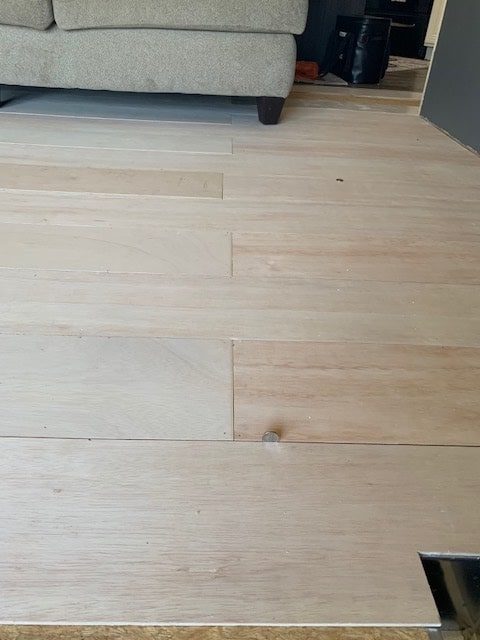
    Since foam board can also act as both an insulator and a vapor barrier for your mobile home it’s ideal to install under your flooring.

    Disadvantages of Foam 

    Fire is probably the biggest disadvantage of foam board insulation and meeting your local fire protection codes may be bothersome. Foam is fairly hard to ignite, but once it catches it emits a dense smoke and toxic gases. However, some manufacturers spray the foam with fire retardant. You’ll want to research your local codes.

    Three Common Types of Rigid Foam Insulation

    Types of Foam Board Insulation

    Image Source

    The three most common types of foam board are made of polystyrene, polyisocyanurate, and polyurethane. All are petroleum-based products.

    Rigid foam can be used in walls, roofs, and foundations, for retrofits or new construction. Most varieties of foam have a higher R-value per inch than fiberglass, cotton, or cellulose. (Green Building Advisor)

    Here are the three main types of rigid foam insulation:

    Molded Expanded polystyrene (EPS or MEPS)

    (Image source)

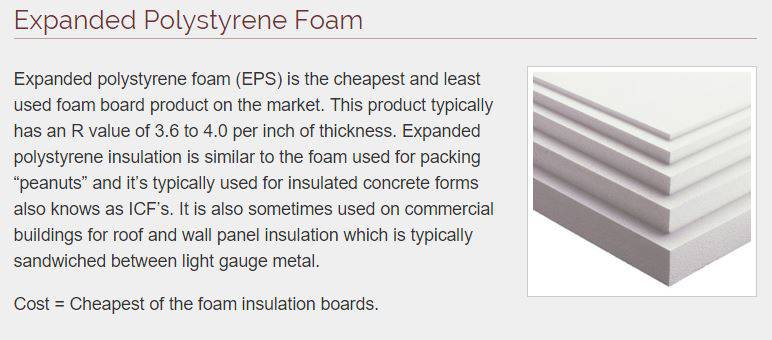
    Expanded polystyrene is the most common type of foam insulation and the most affordable.

    It is made from the same closed cell foam beads that your coffee cups and shipping peanuts are made from. It is molded, or extruded, into large sheets that can be used in roofing, flooring, siding, and other construction needs.

    The R-value of EPS sheets depends on the density, with a single sheet of foam ranging from 3.6 to 4.2 per inch.

    Extruded polystyrene (XPS)

    types of foam insulation - extruded polystyrene foam

    (Image source)

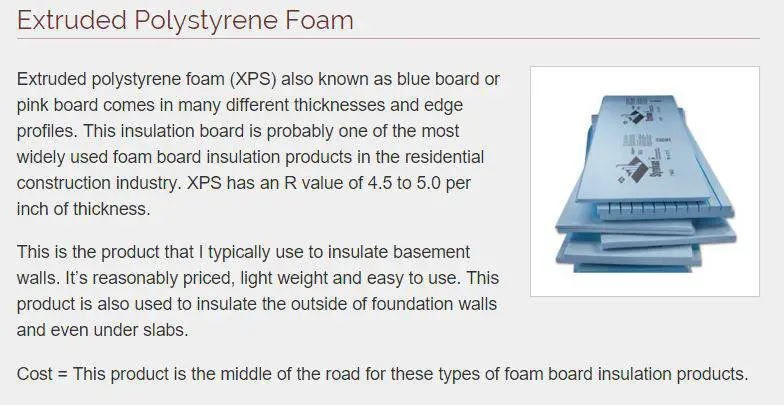
    Extruded polystyrene is very similar to expanded polystyrene but it uses pellets instead of beads, making it smoother and denser. It also has better water resistance. You’ll recognize this product by its colors – it comes in blue, pink, and green depending on the manufacturer.

    You’ll pay more for extruded polystyrene but you’ll get better energy efficiency. The R-value of extruded polystyrene is around 5 per inch.

    Extruded polystyrene is ideal for basements and slabs and makes an ideal choice for insulating under a mobile home if the added cost isn’t an issue.

    Polyisocyanurate (ISO) and Polyurethane

    types of foam insulation - Polisocyanurate and Polyurethane foam

    (Image source)

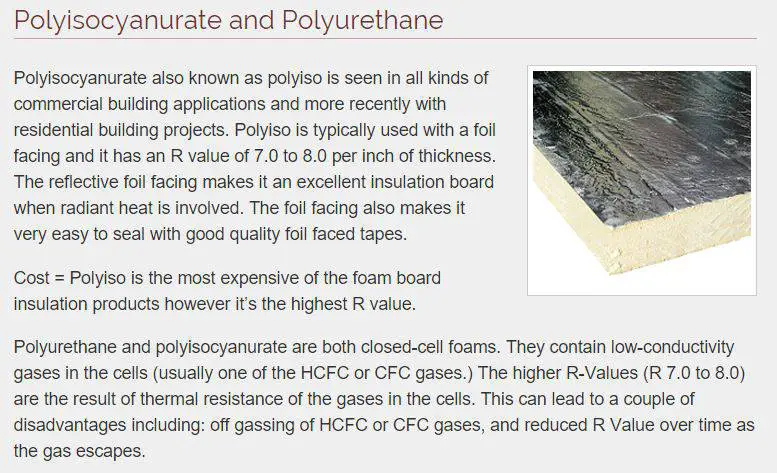
    Polyurethane and Polyisocyanurate have advantages and disadvantages.

    They have higher R-Value per square inch but they are also the most expensive of the three types of rigid foam.

    Foil-faced polyisocyanurate is more resistant to ignition than unprotected XPS or EPS. For this reason, some (but not all) building inspectors allow foil-faced polyisocyanurate to be left exposed on crawlspace walls or in attics without requiring a layer of drywall as a thermal barrier.(Source)

    An advantage of polyurethane is the foil that covers the sides. The foil can act as a vapor barrier and is used most often in roofing and foundations.

    Laurel and Bryan’s ‘Death Zone’ of Cold Air

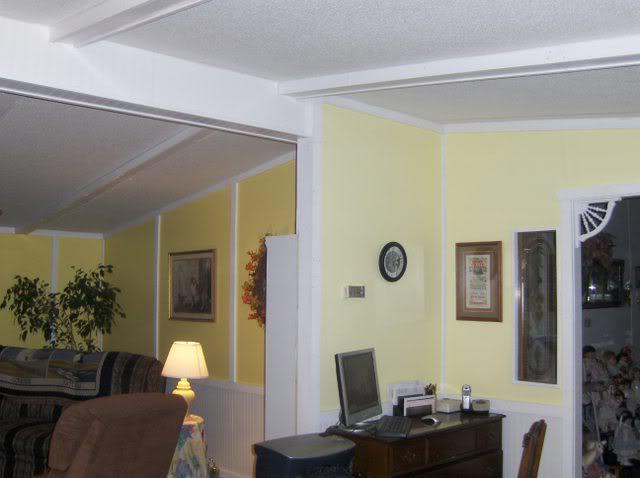
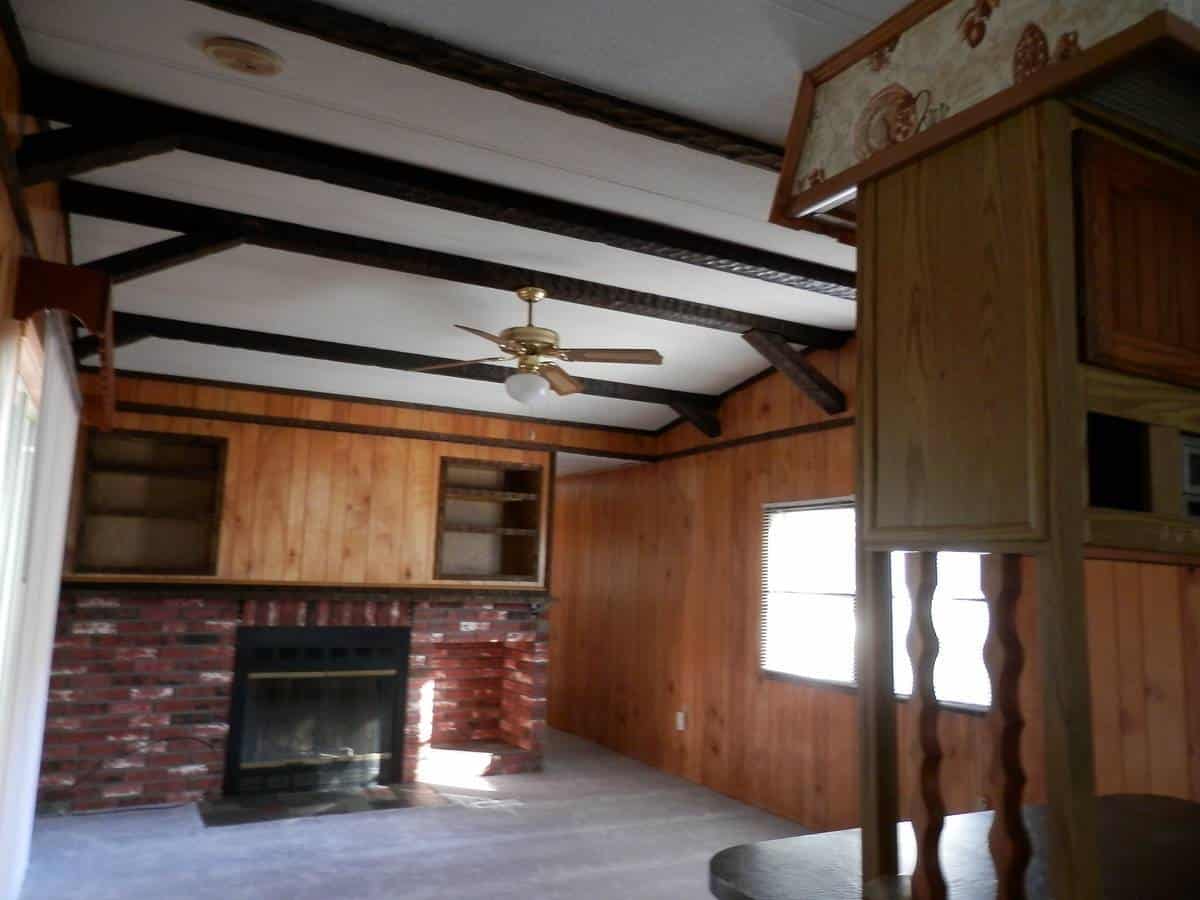
    The first year in a new home, especially an older mobile home, is always a learning experience. That was certainly true for Laurel and Bryan Adams when they moved into a 1974 Olympic single wide mobile home.

    The couple’s new vintage mobile home had served Laurel’s aunt very well until she passed last year at the age of 93. While the mobile home’s decor may not have made it to the cover of Home and Garden, auntie had lovingly updated it over the years. She had heroically painted the walls herself with a three-inch paintbrush in bright yellow and aqua.

    During their first winter in the home, they learned how much their utilities cost and where all the cold spots were located in the home. Needless to say, their 1972 mobile home had a few cold spots and their heating costs were too high for such a small home. The following Spring they began researching how to best insulate their home.

    Laurel and Bryan decided to solve their problem energy loss using foam board. They were kind enough to share the details of their project with us, complete with hand-drawn images. How cool is that?

    It was a sound, affordable home that had loads of potential!

    The Adam’s vintage mobile home sits in Edmonton, Alberta, and since older mobile homes are notoriously under insulated, they experienced wild temperature fluctuations during their first winter.

    How to Insulate Under a Mobile Home with Foam

    Once Spring arrived, the couple set out to find a way to increase the home’s energy efficiency, especially in the ‘death zone’, as Laurel playfully called it. The death zone was an area  2 to 3 feet above the floor that remained much colder than the rest of the home.

    Materials Used:

    • 4′ x 8′ Foam Insulation Board
    • Table saw and hand saw
    • 3″ screws with 1″ washers
    • Screwdriver (electric)

    The Adam’s were able to buy their 4′ x 8′ insulation foam board from the manufacturers directly. That saved them almost half off the retail price. It pays to cut out the middleman whenever possible!

    Insulating Under a Mobile Home with 2″ Foam Board

    Insulating under a mobile home - cutaway of mobile home

    Related: 8 Energy Efficiency Ideas for Your Manufactured Home

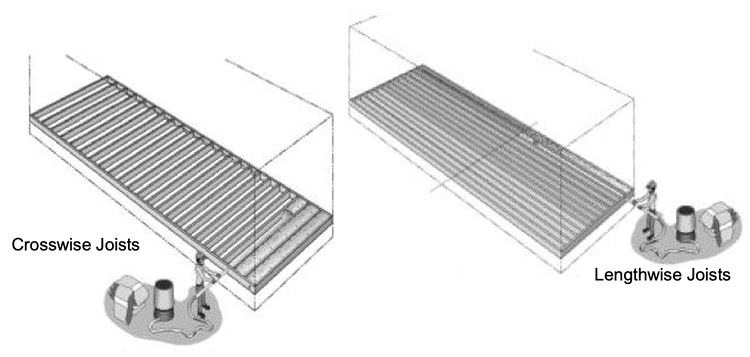
    The mobile home’s floor joists are on 16″ centers, which means the wood floor joists are placed 16″ apart from each joist’s center point. Since the joists themselves are roughly 1.5″ wide the section between each joist was approximately 14.5″ wide.

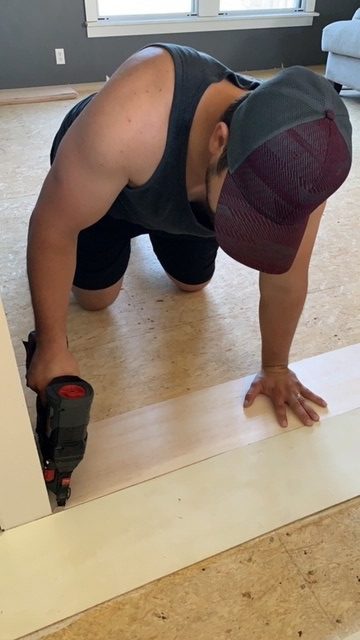
    Bryan bought 2″ thick Styrofoam insulation board and used a table saw to cut the boards 14.5″ so that the foam was easy to push between the joists and stay put (there are 4″ foam boards available but the 2″ is easier to handle).

    Bryan concluded that layering 4 boards together to create an 8″ total thickness of insulating foam would work best for their area’s average winter temperatures.

    Each stack was made of three 14.5″ wide by 2″ thick foam boards. The fourth foam board was left full-size (4′ x 8′) and attached to the bottom of the wood joists. This holds the 3 boards above it in place and creates a total of 8″ of insulation under the entire mobile home.

    Insulating under a mobile home - hand drawn image

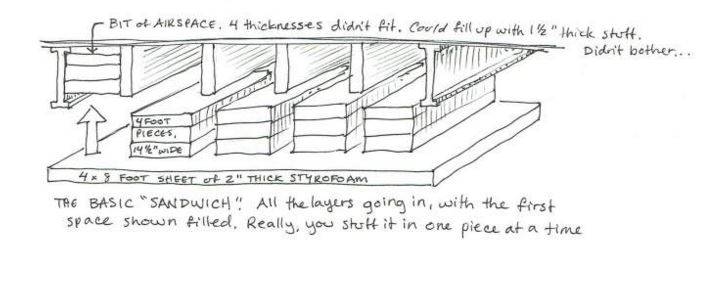
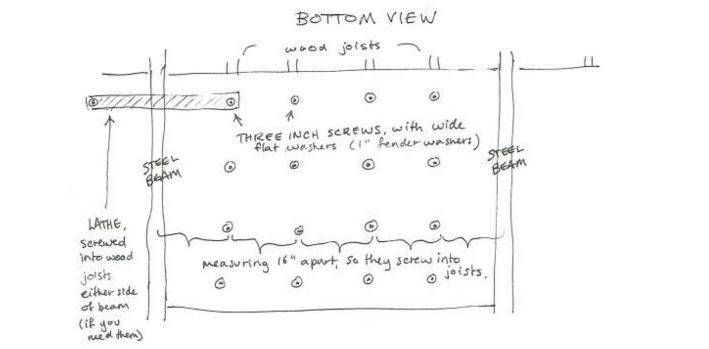
    To secure the full-size sheet to the bottom of the home Bryan used 3″ screws with a 1″ wide fender washer. Since the home was built on 2 steel beams at an 8′ interval he used the lip of the steel beams to act as a shelf for the ends of the foam board. The wood joists are a bit shorter than the steel beams so this method worked well.

    The drawing below shows it better than I can explain:

    Adding Insulation Under a Mobile Home Drawing

    Laurel also drew a schematic of the screw placement. She explained that had Bryan not been able to screw into the bottom of the wood joists that he could have used a couple of different options to secure the foam. A thin wooden lathe could have been used as a bridge to hold the foam into place.

    Insulating under a mobile home - bottom view - hand drawn image

    The results of the couple’s DIY insulation project has been a great success! Laurel states that the ‘dead zone’ is long gone and since the foam has insulated the duct-work under the home the forced air heat is reaching the end rooms better.

    Using Fiberglass to Insulate Under a Mobile Home

    Fiberglass is the most common insulating material. It is made of very fine strands of glass formed in rolls and loose fill batts that are installed between beams, joists, and studs.

    Since it is made of glass it is an excellent insulator that is affordable, non-flammable, and water resistant. The downside is that it is fairly dangerous to handle. You’ll definitely want to use protection when working with fiberglass.

    Depending on density you’ll get R-value ratings ranging from R-2.9 to R-3.8 per inch.

    This is a great video that follow the whole project of removing and installing insulation under your mobile home:

    Using Roxul Rock Wool to Insulate Under a Mobile Home

    One expert recommended Roxul Rockwool for a few reasons. The following benefits are from the Rockwool website:

    • Non-combustible stone wool insulation with a melting point of approximately 1177°C (2150°F)
    • Fire-resistant due to its high melting temperature
    • Water and moisture resistant; does not absorb moisture to maintain insulating value
    • Chemically inert
    • Does not rot or promote the growth of mildew, fungi or bacteria
    • CFC- and HCFC- free product and process
    • Made from natural and recycled materials
    • ROCKWOOL® can contribute to earning LEED® points

    Rockwool is a rigid mineral wool insulation sheathing board that is non-combustible, water-repellent, fire-resistant and sound absorbent

    amzn_assoc_tracking_id = “mobhomliv-20”; amzn_assoc_ad_mode = “manual”; amzn_assoc_ad_type = “smart”; amzn_assoc_marketplace = “amazon”; amzn_assoc_region = “US”; amzn_assoc_design = “enhanced_links”; amzn_assoc_asins = “B01B1QS8XC”; amzn_assoc_placement = “adunit”; amzn_assoc_linkid = “24c7750e30f4acf4864849f448261600”;

    Different Opinions About Insulations

    Some experts may frown on the 4.5″ left over from each 48″ wide board after getting 3 cuts. That seems kind of silly of a reason to not like a project as the foam can be used on a multitude of other things. You may even be able to get 2 or 3 different areas of your home insulated using the ‘waste.’

    In the construction world you have the wrong way and the really wrong way. Everyone has an their opinion and everyone else is wrong. Ask 3 different construction exerts the same question and I guarantee you will get 3 different answers.

    Related: Useful Mobile Home Repair Manuals 

    Installing a Ground Moisture Barrier

    It is recommended that all mobile and manufactured homes have a ground moisture barrier. A barrier is usually just a polyethylene plastic sheeting placed directly on the ground and secured under the home to act as another shield between earth and home. it should extend 6″ past your mobile home skirting.

    The ground barrier combined with a vapor barrier (whether via a separate belly wrap or foam installation) will protect your mobile home from moisture. It can also deter animals from going under your home and help you locate leaks and water issues as the water will sit on top of the plastic instead of soaking into the ground.

    Check your Local Codes Before All DIY Projects

    Inspections are a necessary evil in the construction world, regardless of what kind of DIY project you do. Every location, whether in Canada or America, has building codes that must be met for all update and remodeling projects. The location of your home will impact the codes that you will need to meet. Homes in Canada face different issues than homes in Florida so be sure to research your local codes.

    Summary for Insulating Under a Mobile Home

    Repairing and insulating under a mobile home (or the mobile home belly) isn’t the most exciting remodeling project but it can make a huge difference in your energy bills and your comfort.

    Unfortunately, most mobile homeowners have no idea how important the belly of their mobile home is to the overall condition of their home.

    If your home is losing heat or seems harder to keep heated or cooled you may want to consider insulating under your flooring as the first step in updating your home.

    Insulating your mobile home with foam is proven to be effective. The foam is easy to use and fairly affordable for its high R-value and energy conservation properties.

    Laurel states that she doesn’t think insulating the walls would have made nearly as much of a difference as the underfloor insulation has and she would know best, it hit -4 Fahrenheit last week and their home stayed warm and the death zone is long gone.

    A HUGE thank you to Laurel and Bryan Adams for sharing their project and teaching us how to insulate and repair a mobile home underbelly. and to Laurel for the awesome drawings!

    Learn more about a mobile home belly board and underbelly here.

    Thank you so much for reading Mobile Home Living! 

  • Affordable DIY Plywood Flooring Project

    The Beseda’s farmhouse style manufactured home just keeps getting more beautiful with every passing weekend. The couple’s most recent weekend remodeling adventure was an affordable DIY plywood flooring project and Ashley was kind enough to share every detail with us.

    Ashley’s double wide manufactured home is a perfect example of modern farmhouse inspired decor. White shiplap walls pair perfectly with dark stained wooden ceiling beams. The farmhouse style has taken over homes across the nation since the HGTV show Fixer Upper first aired. The traditional farmhouse look is a throwback to the simple days when things were made of natural elements that gracefully weathered over time. It’s a style that embraces imperfection and that’s becoming more important as technology takes over every facet of our lives. Our appliances can talk to us now so creating a more primitive style home helps balance things out a little bit. See more awesome farmhouse style mobile homes here.

    farmhouse style manufactured home remodel
    Ashleys Gorgeous Farmhouse Style Kitchen.

    We’ll share all the details of Ashley’s DIY plywood flooring project along with tools and materials lists and expert tips to help you complete your own beautiful flooring project.

    Plywood can be a beautiful and affordable floor covering. It is an especially great choice if you are going for the popular primitive farmhouse style but it can also work well for other decorating styles: casual cottage, country primitive, and even modern tradition.

    Choosing the right material is the first step for a successful DIY plywood flooring project so we’ll start with a short guide to help you understand plywood.

    Plywood 101

    Plywood is made from several thin layers of wood that have been glued together to form a solid sheet. When it first hit the construction world, Popular Science described plywood as a layer cake of glue and lumber.

    Plywood is an engineered wood but it’s a bit different from OSB, MDF, and particle board.  OSB, or oriented strand board, is made from several small chips and slivers of wood that’s glued together. Particleboard and MDF are essentially made of lumber dust and glue and are often used as subflooring and cabinetry in the most affordable mobile homes.

    Plywood is made from a huge log placed into a lathe. As the lathe spins, a paper-thin layer, or veneer, is sliced from the log much like peeling the skin from an apple. These veneers are placed in layers of varying direction and glued together to form a strong, aesthetically pleasing panel.

    plywood production
    How plywood is made and formed.

    Plywood Grade and Thickness

    Plywood comes in two main grades and several thicknesses. There is project grade and construction grade. As you probably guessed, construction grade doesn’t have to be as uniform and ‘pretty’ so it will usually be cheaper. Construction grade is mostly used for exterior house sheathing, the paneling under roofing or siding, where it goes unseen. Project grade plywood is more uniform and, well, prettier. It will have met appearance tests that construction grade plywood couldn’t pass.

    Pine plywood is softer but affordable. If you like a more worn and weathered look pine plywood is a good choice. Birch and oak plywood will hold up a bit better but they are a bit more expensive.

    For that worn imperfection that the farmhouse style so perfectly embraces, pine plywood that’s been primed, painted, or whitewashed should work just fine. You can add a bit more protection by using primer and enamel paint on the plywood.

    Buying Plywood

    • A 4′ x 8′ sheet of pine plywood costs between $15-25.
    • You can order plywood a few days in advance at both Home Depot and Lowe’s to ensure there’s plenty available to choose from. Always chose your own lumber and look for uniform panels that lay flat and have no sign of water damage.
    • Most major home improvement stores offer free or low-cost cuts. For just a couple of dollars more, you can have the store cut your 4′ x 8′ plywood panels into whatever width you need. For larger rooms, you’ll probably want to go with 8″. Keep in mind that in the lumber industry measurements are not true. For example, instead of telling them you want 8″ wide planks, tell them you want the 48″ panel divided by 6 so you don’t waste any. Learn more about plywood here. 
    Affordable DIY Farmhouse plywood flooring project - flooring 3d


    Understanding Mobile Home Floor Construction

    Before you do this DIY plywood flooring project it’s important you understand that a manufactured home has a different kind of flooring construction than a site-built home. Your Mobile Home describes a mobile home’s floor as a sandwich: on the bottom is your belly wrap, in the middle is the floor joists, insulation, and ducts, and on the top is your subfloor and floor covering. It’s important that the middle of your ‘sandwich’ be insulated well and your underbelly be a solid sheeting without holes or rips. Learn about mobile home insulation here. 

    To install plywood flooring you need the nails to sink into the joists and nowhere else. This makes the new flooring more secure and eliminates holes in the subfloor. Laying out and cutting the planks of plywood to the correct lengths (not widths) is the most difficult parts of this DIY plywood flooring project.

    Material List for DIY Plywood Flooring Project

    Know How Much Plywood you Need

    You’ll need to do a little math and find out how many sheets of 4′ x 8′ plywood you’ll need. For example, a 12′ x 16′ living room has 192 square foot. A 4′ x 8′ piece of plywood is 32 square foot so divide 192 by 32 and you’ll get 6. That’s how many sheets you’ll need but always buy an extra for those ‘just in case’ cases.

    Tools

    • Brad Nailer with 1 3/4” nail set
    • Table saw
    • Chalk line
    • Safety goggles
    • Stud finder (if needed to find the floor joists)
    • Paint
    • Paintbrushes and Paint Trays

    Paint Brush Tips

    Professional painters have shared many tricks with us over the years that may help you whitewash your plywood flooring.

    For new brushes, it may help to soak them in water for a couple of hours before you dip it in the paint for the first time. Wetting the brush first makes cleanup easier and can keep the paint from soaking into the heel of the brush. You may be able to help loosen up an old stiff paint brush by soaking it in fabric softener.


    The Step by Step Process for DIY Plywood Floor Project

    To start on their DIY plywood flooring project, the handy couple removed all the furniture from the room and then pulled up the carpet and the padding. The subfloor was all that remained.

    Step 1: Removing the Carpet and Padding from the Room 

    Ripping out old carpet in manufactured home for affordable DIY farmhouse flooring 10
    Ashley’S Husband Begins Removing The Carpet And Padding From The Room.

    Step 2: Ripping the Plywood into Planks

    Once the carpet and padding were removed they planned out their layout and began ripping the panels into planks. Learn more about table saws here. 

    DIY farmhouse flooring cutting plywood into planks on table saw 2
    Ripping the plywood into planks.

    Step 3: Installing the Plywood Flooring

    The planks were nailed into the joists under the subfloor.

    nailing down planks on subfloor of manufactured home for affordable DIY farmhouse flooring
    Ashleys husband begins nailing down the plywood flooring.

    Ashley and her husband used 1 3/4” nails in an 18 gauge Brad nailer to nail down the planks. The wanted spacing between their planks to give the flooring a true farmhouse look so they used nickels as spacers.

    DIY farmhouse flooring project - plywood has been laid and ready for paint
    The plywood flooring has been installed and ready to paint.

    Step 4: Ready for Paint

    After the flooring was laid, it was time to whitewash the plywood. Ashley wanted her flooring to be more painted than stained so that less wood showed through. To get that, she mixed her Valspar paint a little thicker.

    Ashleys used Valspar Medallion paint in Swiss Coffee.

    She explained that mixing her whitewash in smaller batches worked best. If she mixed more than a couple of cups full of the water and paint mixture the paint would sink to the bottom leaving a watery top. In the video above, she shows the consistency she liked best.

    She mixed 4 large spoonfuls of paint to 8 even spoonfuls of water at a time and then brushed the mixture onto the boards.

    Once the floor was dry, she sealed it with Minwax Polycrylic in clear satin, following the directions on the can. She likes the product because it doesn’t yellow the floors.

    The Polycrylic was left to dry and then they added base shoe trim around the room where the floor meets the walls. They painted the trim the same white they had used for the walls and the whitewash for the floors.

    Affordable DIY Farmhouse Style Plywood Flooring - finished
    The finished DIY plywood flooring project looks great!

    Conclusion

    Plywood isn’t just for subfloors anymore. It’s a perfect flooring material for primitive or farmhouse styled homes because the imperfect and worn look is exactly what those styles are all about. See another double wide with farmhouse style DIY plywood flooring here. 

    If you follow our tips and Ashley’s step-by-step instructions you can create your own beautiful flooring for less than $200 per room. That’s a steal compared to most floor coverings!

    A big thanks to Ashley and her husband for sharing her DIY farmhouse flooring project with us! You should follow her on Instagram @cottonncopper.

    Do you have a plywood floor? We’d love to hear about it in the comments below! As always, thank you for reading Mobile Home Living!

  • Load-Bearing Walls in Mobile Homes

    Load-Bearing Walls in Mobile Homes

    This week we are looking at questions about removing walls in a mobile home. These questions cover questions about marriage walls, load-bearing walls, and removing closets.

    Questions about Removing Walls in a Mobile Home

    Is The Marriage Wall Necessary?

    I have the dreadful marriage wall running right through the center of my house. Family room on one side and the living room on the other. A real separation in the home. Is there any way I can take out the marriage wall? I’d settle for taking it out and putting in two columns to support the overhead.

    Great question! Your marriage line is always load-bearing. That doesn’t mean removing it is impossible. Still, it would be an expensive and delicate job requiring an engineer with proper knowledge of load and shear-bearing construction techniques in manufactured homes. Even when the experts are brought in, there will usually always be some issue that arises in the future.

    Simply put, anything is possible if you want it bad enough, but it’s not a good idea to modify the marriage line in a manufactured home.

    Load Bearing Walls

    According to the article, “In a single wide, with recent construction methods, there is no load bearing interior walls.” How recent?

    From what I understand, that is a broad brush that can be applied for all single wide construction as they are designed so that the exterior walls hold the load. However, there can be load-bearing walls in the interior of a single wide – it is dependent on the home’s design.

    The best thing you can do is bring in an expert and have them look to see if the wall is load-bearing. Of course, even load-bearing walls can be modified with the correct reinforcement used.

    painting mobile home walls and using new trim to cover the seams -questions about removing walls in a mobile home

    Related: Ask a Mobile Home Expert Questions about Mobile Home Additions

    Can I Use A Beam Where My Marriage Wall Is?

    We are in the process of doing a complete remodel on a double wide. Right in the center of the family room and kitchen/dining room is what used to be a pantry that was probably 4 ft wide. I know it is the marriage wall, but have you ever seen someone take it completely out and put in a large beam to support the weight? I want to completely open up this area.

    Listening to homeowners that have modified their marriage line has made me realize that there will almost always be some issue arising from a marriage line modification. It could take 5 years or 20, but there is usually always some problem that will occur. I suppose the homes are just so intricately designed to perform well in transport that even the slightest modification can cause a butterfly effect.

    Of course, you can do anything with the right knowledge, people, and budget. In most site-built construction, a post and beam concept is used to replace load-bearing walls. I must recommend that you bring an engineer that is familiar with manufactured home construction to ensure that you can do the project without damaging the home.

    Related: Read more about removing walls in a mobile home here. 

    Removing Closets

    I want to remove my daughter’s closet in our single wide to give her more space due to a tiny room. It is a 1996 Norris, and her bedroom is on the very end with a bay window. The closet takes up the entire left side of her wall beside her window with two doors. Would this be a pain to remove? It also has an electrical outlet placed 6 inches from the exterior wall on the wall we want to remove to make more space.

    As far as I know, a typical single wide will have no load-bearing interior walls, so it should be fine to remove the closet walls. You’ll need to be careful, though and make doubly sure there is no load on whatever walls you want to remove (look for doubled studs and odd angles). Hiring an engineer is never a bad idea.

    Since it has double doors, I doubt it’s load-bearing. You’ll need to cut the power to the room and take the paneling off very easily to ensure electrical safety. Also, plan on the way to re-route the wiring if it needs to be moved. Other than the marks left on the flooring and the ceiling, this should be a fairly easy weekend project.

    Related: How to Paint Vinyl Walls in Mobile Homes

    1985 Conner single wide mobile home - painted panelling and closet in bedroom - should you buy an older mobile home and remodel it - questions about removing walls in a mobile home

    Removing Half Walls

    I have a Redwood manufactured home that’s about 20 years old. In my kitchen, there are two little walls. One is next to the fridge and laundry room door. I want to remove it so I can get a larger fridge. Is it possible?

    Typically, you can remove interior walls in a manufactured home as long as it’s not load-bearing.  Load-bearing walls in manufactured housing include the exterior walls and the marriage line in a double wide. But I have to suggest that you consult an engineer before you do it (legally). Load-bearing walls are usually the exterior walls and walls along the marriage line of a double wide.

    Our Ask a Mobile Home Expert Series Continues Next Week!

    We hope these questions about removing walls in a mobile home have been helpful! Remember to comment below if there is a question we can help with.

    Thanks for reading Mobile Home Living!

    Disclosure: Any answers to questions about removing walls in a mobile home posed and any recommendations or information provided herein should not be used as a substitute of an expert or any relevant professional that has inspected the issues in person.

  • Mobile Home Ceilings Guide: Gypsum Ceiling Panels

    Mobile home ceilings are a popular topic amongst homeowners. They play a major impact in every room so it’s important that they look great. We’ve already covered how to paint mobile home ceilings so in this article we cover the different designs of gypsum ceiling panels and how to buy replacement panels.

    Most mobile homes and older manufactured homes (or lower end, more affordable models) have ceilings made of gypsum instead of drywall.

    Gypsum is a natural mineral used for blackboard chalk, drywall, and wallboards in mobile homes. It’s affordable, lightweight, and doesn’t require finishing which makes it a perfect material for ceilings. Manufactured home builders use gypsum wall panels and ceiling panels.

    Gypsum ceiling panels are a close cousin to drywall. The major difference being drywall is usually thicker and has a paper wrapping on all sides making drywall smooth. Mobile home gypsum panels are not smooth, they have a slight texture that most homeowners dislike.

    The gypsum panels will usually run the entire width of a single wide or half the double wide. They are typically 16″, 24″, or 48″ wide and 5/16″ or 1/2″ thick.

    There are four major disadvantages of older gypsum ceiling panels. First, they are delicate and easy to damage. Secondly, the older mobile home ceilings tend to sag or become unattached from the trusses. Finally, they also tend to turn yellow.

    Popular Mobile Home Ceiling Designs

    The image below shows a typical 4-foot wide gypsum ceiling panel system with a slight texture. Notice the roses?

    A 4′ Wide Ceiling Panel Is Attached To Every Truss That Is 16″ Apart.

    Ceiling Panels with Rosettes

    One of the most common mobile home ceiling designs uses 4-foot wide ceiling panels screwed into the roof trusses every 24″ or 16″ (the typical space between the roof trusses). A flat plastic trim covers where two seams meet and rosettes are used on the trusses in between the seams.

    Rosettes are decorative washers used on the screws to attach the ceiling panels to the roof truss. They are screwed into every roof truss except where two panels meet. In the image above, the rosettes are used at 16″ intervals on a 48″ wide panel (meaning the trusses are 16″ apart). A batten, also called a spline or strip, covers the seams where two panels meet.

    Rosette Washer For Screws

    You can buy 25 rosettes with screws for $4.50 at Mobile Home Parts Store here.

    Seaspray Gypsum Panel
    Mobile Home Ceiling Panels Are 4 Foot Wide And Has Screws With Rosette Washers And A Channeled Batten That Covers The Seams.

    Ceiling Panels with Beaded Profile

    Another mobile home ceiling design uses 16″- 24″ wide ceiling panels with a spline covering the seams where two panels meet.

    Dodi Dolendi painted her mobile home ceiling recently. You can see how the battens yellowed more than the panels because they are made of plastic.

    Ceiling Panel with Channel System

    A channeled ceiling divider is another way to install ceiling panels. The lip is stapled into the top of the truss and the next panel sits in the C-channel.

    Another popular method of installing gypsum ceiling panels on a mobile home are these integrated strips. They are glued over the seams of the panels. You will need to loosen one of the ends and then use a serrated blade to slide behind it to loosen the adhesive and pull the strip down.

    mobile-home-ceiling - gypsum ceiling panels

    Many ceilings in older mobile homes have flat battens (also called splines or strips) that cover the seams where each panel meets. However, some builders were a bit more creative and gave their ceilings a mini-coffered design with dimensional beams, aka false beams.

    Some builders even installed lights into these boxes for a little added flair like the home below.

    April Lea West Recently Purchased This Cool Mobile Home With Lighted Ceiling Beams. I Hope She Keeps Them!

    This mobile home has a more rustic wood beam design that both conceals some of the seams and helps give the home that peaked gable roof at the front door:

    Rustic Wood Beams Used On A Mobile Home Ceiling.

    In order to use shorter ceiling panel lengths and give the home a custom coffered ceiling design, some manufactured home builders installed false beams that span straight down the middle of the ceiling and down each side to cover the ceiling panel seams.

    This Home Has A Large Beams Running Down The Center Of The Ceiling And Down The Sides Every 4′ To Cover The Seams.

    Mobile Home Ceiling Panels are Not Easy to Find

    The chances of finding the original ceiling panels that match your home are slim to none. Sorry!

    It would make life too easy for us lowly mobile and manufactured homeowners if we could actually find and afford replacement materials for our homes. Bathtubs, doors, vinyl patterned wallboards, and gypsum ceiling panels are difficult to find and if you can find them they are expensive.

    Your best (and probably only) chance of finding the gypsum ceiling panels you need is at your local mobile home supply store.

    SeaSpray, the Brand Name of Gypsum Ceiling Panels

    mobile-home-ceiling-replacement-supplies-R-and-G-

    You’ll want to ask your local mobile home supply store for gypsum ceiling panels. The most common brand is SeaSpray Brand Hi-Strength MVR Ceiling Panels by National Gypsum but many mobile home suppliers sell them as C-Spray instead of SeaSpray. I’m not sure if that’s a licensing thing or if it’s a whole different product to be completely honest.

    It’s nearly impossible to get these panels for a few reasons:

    • They are 14′ long and very thin and delicate. You have to fully support the panels while in transit so they don’t break.
    • Gypsum ceiling panels are easily damaged
    • The chances of finding an exact match replacement panel for your ceiling is slim to none

    If you can find a local mobile home supply store that carries them (or will order them for you) consider yourself lucky. But that still won’t help because you need a panel that has the same texture as yours.

    mobile home ceilings - Gypsum Ceiling Panels

    Ordering Ceiling Panels

    Supply houses will not deliver or ship these panels and they offer no guarantee or exchanges after you order them because they are so easy to damage and hard to handle.

    The SeaSpray panels are available in 5/16″ and 1/2″ thicknesses and are 4-foot wide and between 84-192″ in length. You’ll probably want the 5/16″ panels that are 4 foot wide and as long as the width of your single wide mobile home (or half the side of a double-wide).

    The 4-foot x 13.9 foot and 5/16″ thick panels cost around $58 each last I looked. If you are just repairing or patching a ceiling panel you’ll want to order the size of the original panel.

    Tip: If you are able to find these panels buy at least 15% more than you need to compensate for damage and install errors.

    To be honest, your best option for replacing mobile home ceilings is probably drywall or one of our favorite mobile home ceiling replacement materials we listed in this article.

    Notes on Mobile Home Ceilings

    Have you replaced your mobile home ceiling with a unique or creative material? Have you done a ceiling replacement with sheetrock? We’d love to see and hear from you in our new Facebook group, Mobile Home Living: Remodels and Repair. We’ve managed to get over 2,000 members in just a few months and everyone is so friendly, supportive, and helpful.

    As always, thank you so much for reading Mobile Home Living®!