Melissa Fowler and Darell Payne have done a tremendous job of completely remodeling the kitchen in their 1971 Skyline single wide.
Skylines are known to be high-quality homes. The original goldenrod sink, stove, and oven as well as the countertop and cabinetry was still intact but wasn’t functioning as well as they did 42 years ago. When the oven finally died, they decided it was time for a proper fair well with plenty of style.
The kitchen had great storage to begin with and utilizes the L-shaped counter layout. The dining room to the side of it, which is so popular in our homes, was also set up well. All it needed was someone with the drive and passion to make good into great and that’s exactly what they did!
The Before
Here’s the before photos:
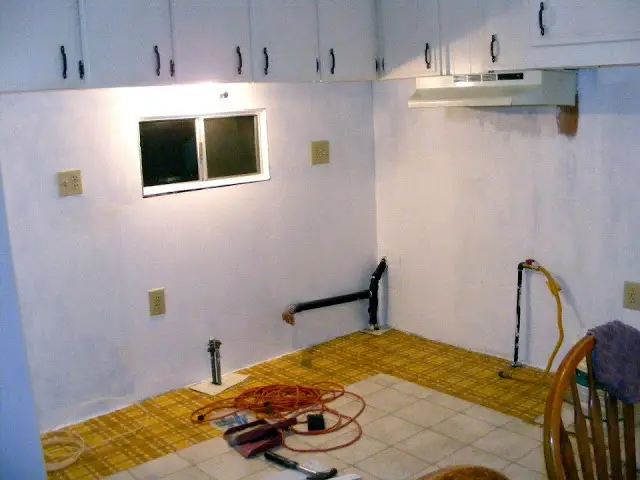
The kitchen looked great to be 42 years old! The white paint with goldenrod and red accent was a very cheerful environment. There’s always room for improvement though! The first thing they did was take the wallpaper off and removed the bottom cabinetry, stove, and oven. They re-used the upper cabinets but heavily re-enforced them for added strength and smoothed and painted them to a like new finish. The also re-used the hardware hinges and pulls from the removed lower cabinets on the new cabinets which saved a lot of money.
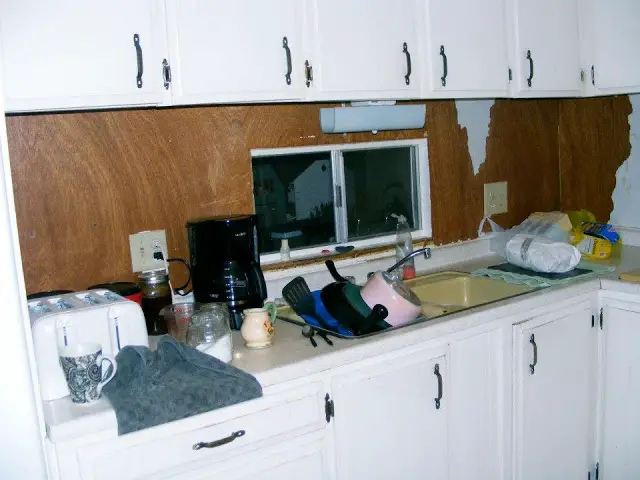 |
| Wallpaper Removal |
 |
| Lower Cabinets and Stove Top Going! |
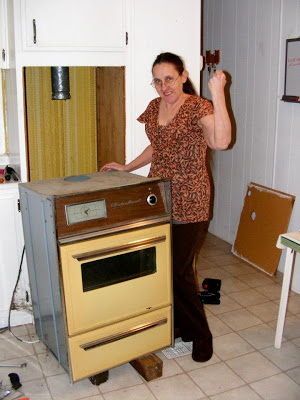 |
| Melissa is happy the old oven is going away! |
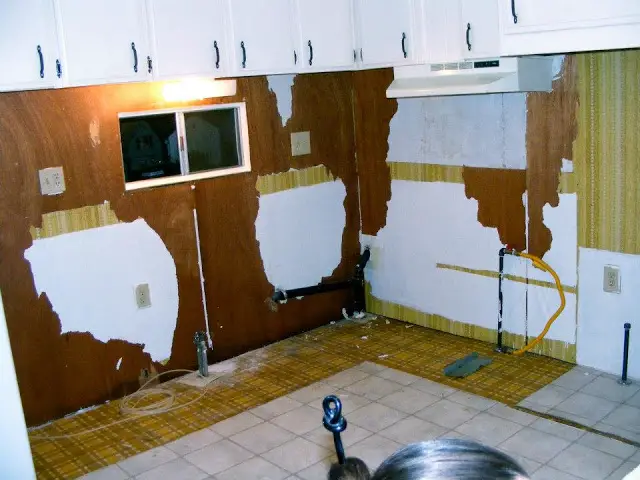 |
| Gutted! |
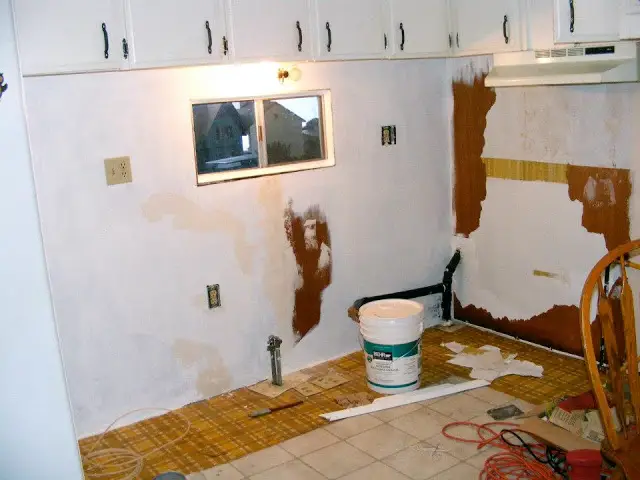 |
| Smoothing, patching and painting the walls. |
The flooring had already been replaced by the previous owners but they only went as far as the cabinets, not under them. Lot’s of people do that and it’s not the wrong way but it’s not the right way, either. If you aren’t going to replace the cabinets there’s no need to go through all the steps to remove them just to lay new flooring. It’s a good idea to do replace flooring and cabinetry all at once if possible.
In this case, it caused some issues because the new cabinets weren’t as deep as the old ones and the old flooring showed. However, Darell and Melissa came up with a great way to cover up that old flooring. You’ll see how in a moment!
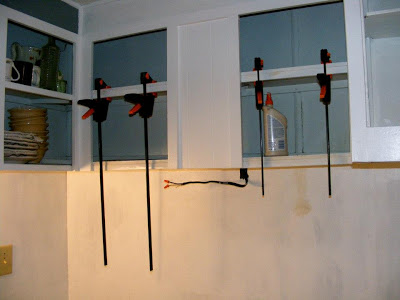
Here, they reinforced the upper cabinet shelving and of course smoothed and painted the cabinet doors. Darell is using new boarding over the old to get it all straight and strong.
The area that housed the oven was removed. This added more counter and cabinet space beside the stove, a useful place indeed!
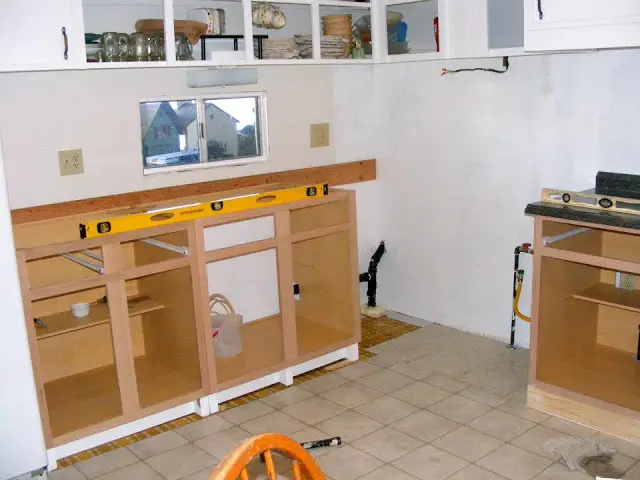
Once the walls were ready and the upper cabinetry repaired, they started bringing in the new bottom cabinets. The trick with all cabinet installations is making sure they are straight and even. If your corners or flooring isn’t perfectly square (and whose is?) you will have to use shims to get it as even as possible. You can do it!
A remodel never goes quite as smooth as we all hope. Even master carpenters will encounter a few issues that take extra patience to deal with. You should be prepared for the worse but hoping for the best at all times. After it’s all over, you will look back and laugh at it but after days of eating nothing but microwave food cooked in the living room, your patience is thin and emotions are high. In this DIY, the bathroom shelf fell completely down while they were hammering the oven hood up due to the shared wall vibrations. A good attitude is all that is needed to remedy anything though and they quickly got it squared away.
The only professional that was called was a plumber to get the gas lines up to code and properly installed. Since the oven was in the wall but being replaced with a single unit, they had to properly seal off the old vent, as well.
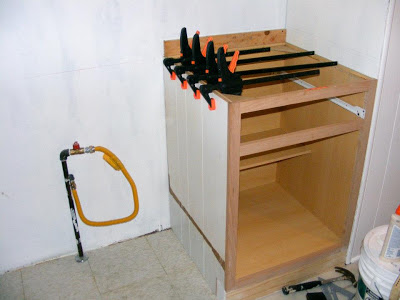
The issue with the old flooring was easily solved in 2 ways. First, they painted the base of the cabinets for moisture protection. After that, they built a skirt around the lip and painted it white. This adds more stability to the cabinet as well. After a few days, they noticed the white was hard to keep scuffs off so they used lattice weave trim, painted it to match the dark grey and applied that over the skirt. It solves the old flooring issue, the scuff mark issue, adds stability and adds color to the lower half of the room. You can’t beat that for a solution!
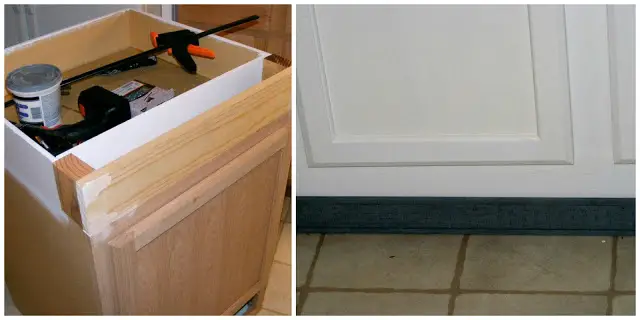 |
| The flooring issued solved. |
 |
| Don’t expect everything to be square. This is true no matter what kind of home it is! |
Once all the cabinets are placed they started adding the new countertop. Making the opening for the sink is the hardest part but with the proper tools and the use of a template it can be done with ease and precision. A good trick to use while cutting the opening out of any countertop that has a small backsplash is to cut from the bottom of the backsplash side. This keeps the tools away from the lip and reduces the chances of nicking or marking the material.
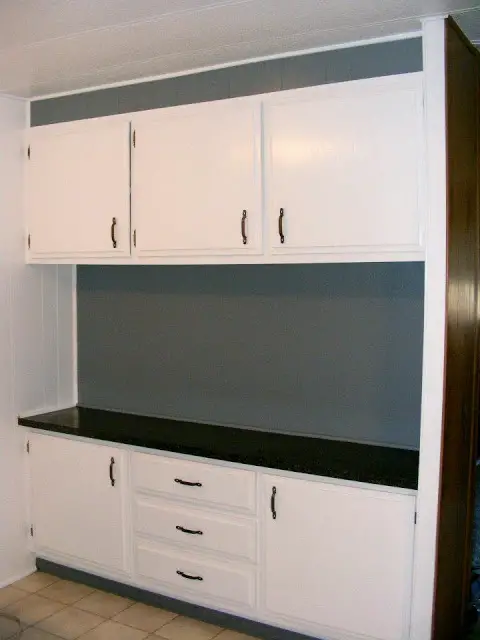
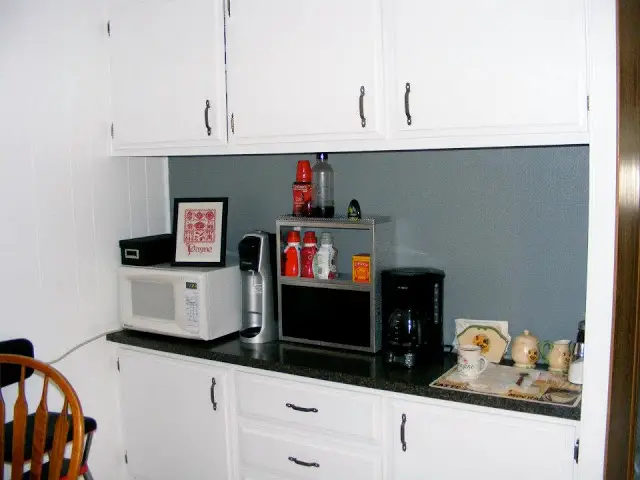
Since the buffet bar/hutch area had a sturdy countertop there was no need to replace it. A sheet of matching laminate easily covers it and at half the cost. When you place laminate down make sure your surface is super smooth. Also, that you use the proper adhesive with a heavy roller. Measure 82 times and cut once! Use brand new blades made for laminate material, too.
The After
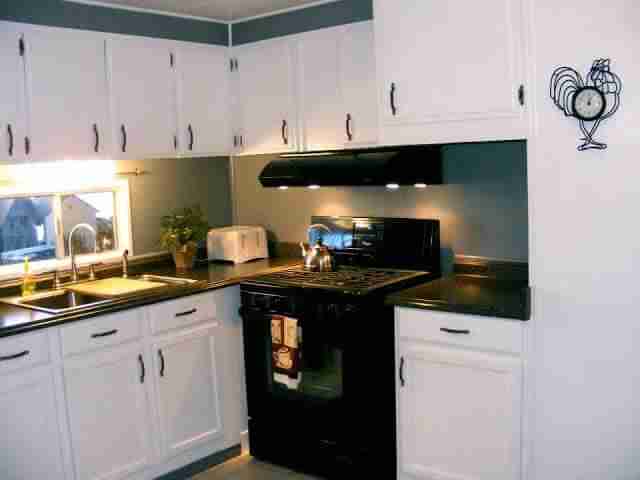
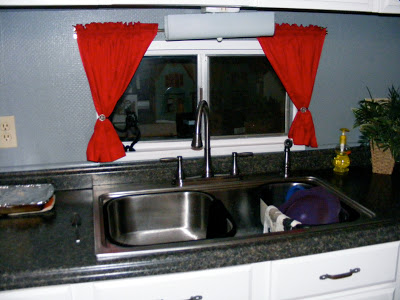
The oven was put into place and the finishing touches were added. For less than $3,000 this kitchen has been given a complete remodel!
Thanks, Darell and Melissa for sharing your wonderful single wide kitchen remodel! It’s a perfect example of modernizing an older mobile home. Tomorrow we will share more photos of the remodel and a candid interview with the couple. You’ll definitely want to read it!
As always, thank you for reading Mobile Home Living!








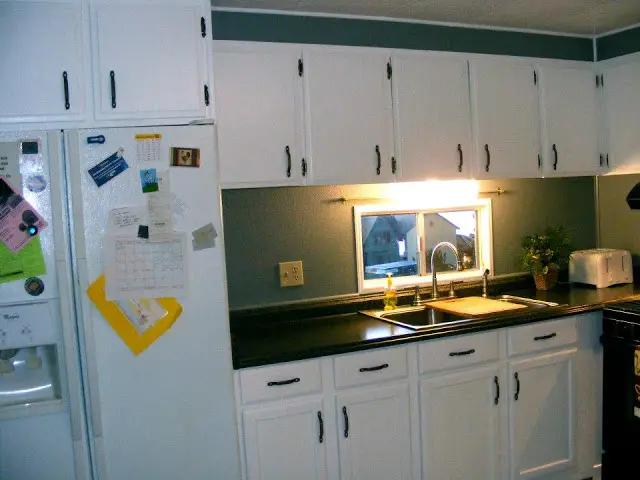

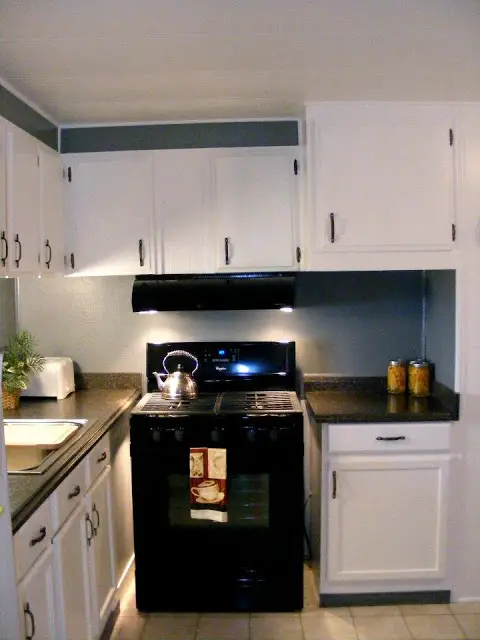
I love the remodel. My only suggestion would be to move the stove over a bit to eliminate the gap, and add a filler piece of countertop so things won't fall through. Can always use the area this frees up for large baking sheets. Nice layout and I really like the buffet area.
Hi Meaghan! Your home is fabulous too! I'm saving up for a whole kitchen remodel myself and oddly enough, everything they did is what I want to do, even the same counter top. It makes such a drastic change. I love that they took photos of the whole process too. You'll enjoy the interview tomorrow, it's very in-depth and informative. Thanks so much for reading and commenting!
It is fabulous! The laminate sheeting only costs about $70 per sheet (4 ft x 8 ft, I think). If you have a smooth, flat surface you can add it to darn near anything with the right adhesive. Thanks so much for reading and commenting!