12 Tips to Ready Your Mobile Home For Winter
- Plug in or Install Heat Tape
- Reverse Your Ceiling Fans
- Add Draft Guards to Exterior Doors
- Change Batteries in Smoke and CO2 Detector
- Drain Outside Hose
- Make Sure Your Hot Water Tank is Insulated
- Add Plastic to Older Windows
- Check For Gaps in Doors and Windows
- Make Sure Your Skirting is Secure
- Give Your Heating System a Once Over
- Inspect Your Roof
- Cover or Remove Your Window AC
It’s that time again, time to ready your mobile home for Old Man Winter. With winter on its way, now is the time to prepare your home. The season brings cold winds, below zero temperatures, and snow which is why we have put together 12 tips to make sure your mobile home is cold-weather ready.
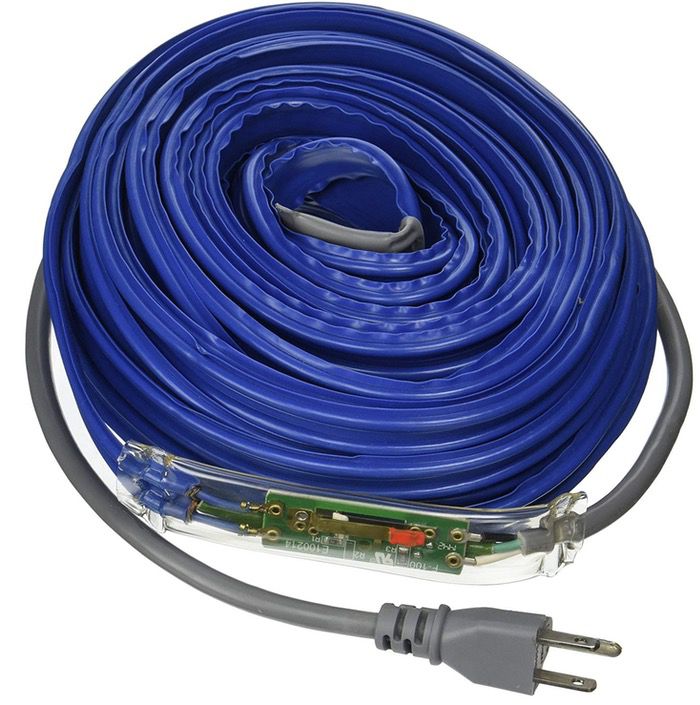
Plug in or Install Heat Tape
If you haven’t already added heat tape to the pipes of your mobile home, that should be the first to-do item on your list to ready your mobile home for Winter. Heat tape is the easiest way to keep your pipes from freezing and bursting during cold weather. If you aren’t familiar with the different types of heat tape or aren’t sure how to install it, check out our how-to article, Mobile Homeowner’s Guide To Heat Tape Installation And Safety.
Reverse Your Ceiling Fans
In the winter, ceiling fans should rotate clockwise at a low speed to pull cool air up. The gentle updraft pushes warm air, naturally rising to the ceiling, down the walls, and back to the floor. This makes a room feel warmer, which allows you to lower your thermostat to help save your energy costs.

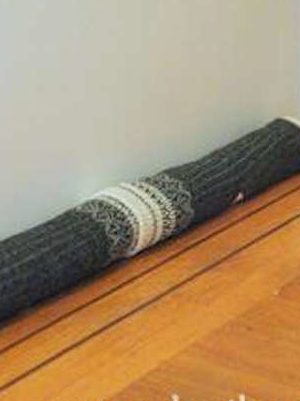
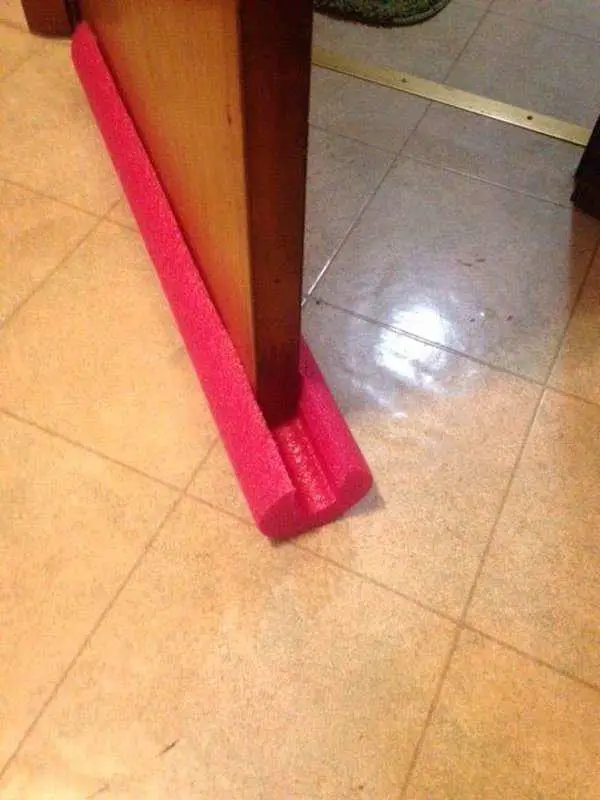
Add Draft Guards to Exterior Doors
Draft stoppers attach to, slide under, or sit in front of your door to block the little cracks and gaps that let cold air in—and your heated air out. We found some cute DIY draft stoppers on Bob Vila or you can find them at just about any department store or online, depending on what kind you are looking for.
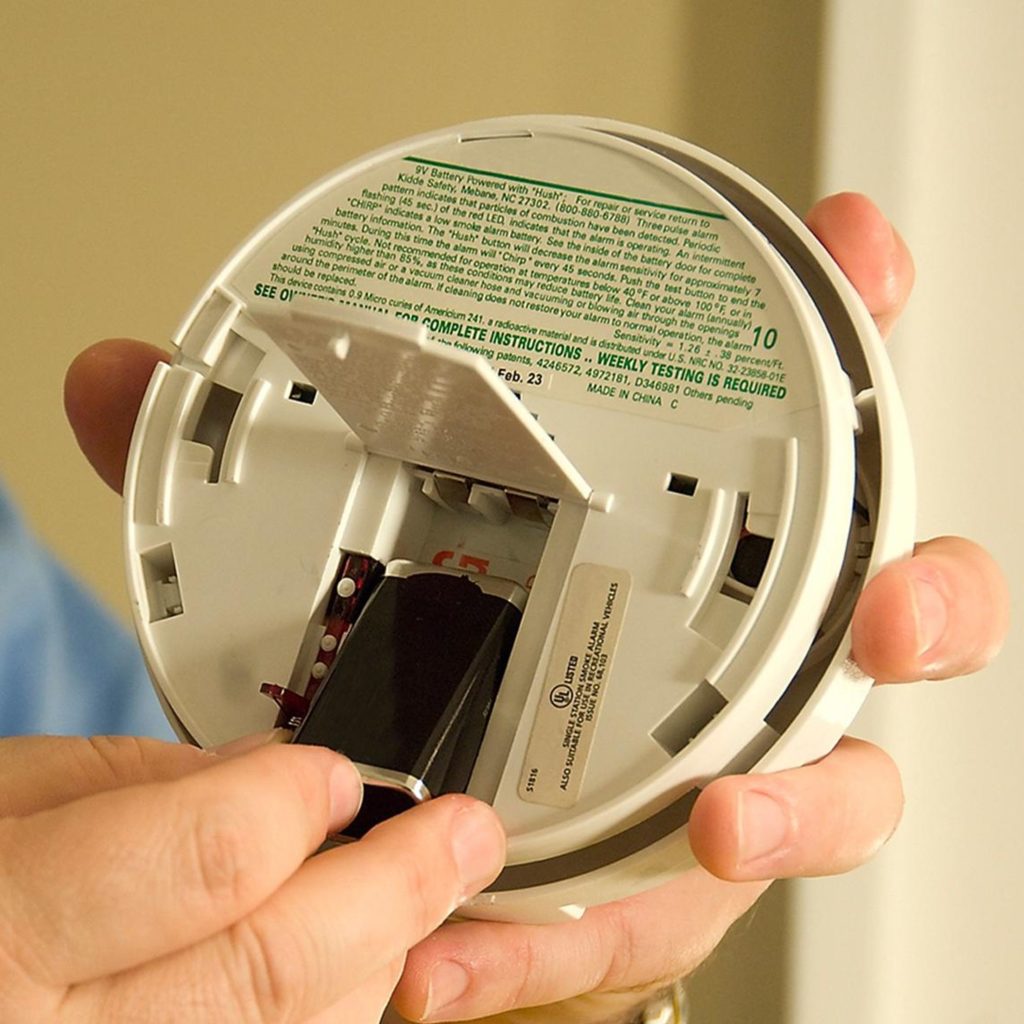
Change Batteries in Smoke and CO2 Detector
Before you start using your furnace or alternative heat sources this Winter, be sure to test your smoke detector and CO2 detector. That means make sure the batteries are fresh, there is no excessive dust, and double-check that your CO2 detector is still within its life expectancy. Any CO2 detector manufactured after August 2009 has an end-of-life date and will need to be replaced after around 7 years.
Drain Outside Hose
If you haven’t already, be sure to install a frost-free outdoor faucet, this kind of faucet is designed to drain any water remaining in the pipe when you close the shutoff valve. Also, be sure to disconnect and drain the garden hose at the end of the season, this will keep the hose from freezing and possibly damaging the faucet.

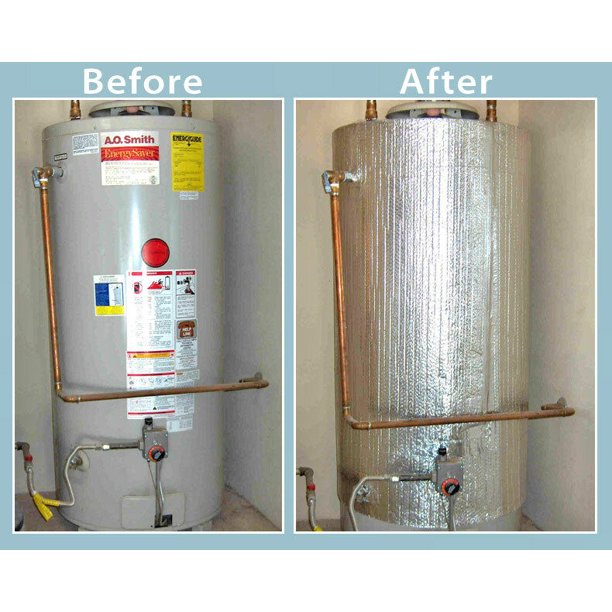
Make Sure Your Hot Water Tank is Insulated
Did you know you should put a blanket around your hot water heater? Energy.gov has this to say about whether you need to add insulation:
If your water tank is new, it is likely already insulated. If you have an older hot water tank, check to see if it has insulation with an R-value of at least 24. If not, consider insulating your water tank, which could reduce standby heat losses by 25%–45% and save you about 7%–16% in water heating costs—and should pay for itself in about a year. You can find pre-cut jackets or blankets available from around $20.
If you don’t know your water heater tank’s R-value, touch it. A tank that is warm to the touch needs additional insulation.
Follow these steps for easy installation:
1) Turn off the water heater. For electric heaters, turn off the breaker at the electric panel. For gas water heaters, turn the gas valve to the “Pilot” position.
2) Measure the height of the water heater and cut the blanket to fit if necessary. Leave the top of the water heater open—it is important not to block the vent on top of a gas unit.
3) Wrap the blanket around the water heater and temporarily tape it in place. For ease of installation, position the blanket so that the ends do not come together over the access panels in the side of the tank. Some tanks have only one access panel.
4) Using a marker, mark the areas where controls are so that you can cut them out. For electric water heater units, there will be two panels on the side of the tank. For gas, you’ll need to mark an arch-shaped hole around the gas valves and burner. Be sure to leave plenty of room around the valve and burner areas below. Make the opening at least 1 inch wider than the valve and burner area. Also, mark the area where the pressure relief valve and pipe are. This will be a pipe that sticks out of the side of the water heater.
5) Install the blanket. Be careful to line up the cut-out areas and then tape it in permanently in place.
6) Turn the water heater back on. Don’t set the thermostat above 130ºF on an electric water heater with an insulating jacket or blanket – the wiring may overheat.
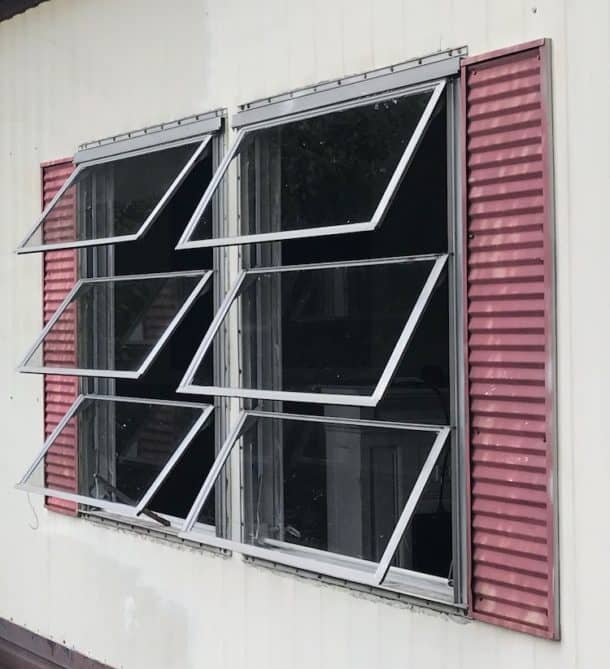
Add Plastic to Older Windows
If you live in an older mobile home that isn’t equipped with double pane windows then you already know that cold air is likely leaking through and creating a draft in your mobile home.
According to Energystar.gov some obvious signs and symptoms that your home has air leaks and can benefit from plastic sealing are:
- Rattling windows
- Visible gaps around the window or door trim
- Noticeable pests and dust entering through gaps or holes in or around the window or door
- Odors from the outside entering the home
- Peeling paint around the window or door frame
Window seal kits are the easiest way to fix this problem, all you need is a hairdryer, some scissors, and a tape measure to install. Then when Spring rolls back around, you just remove the tape and the plastic comes right off.

Check For Gaps in Doors and Windows
If you don’t want to seal your windows with plastic, you still want to make sure that any gaps around your windows or doors that can let cold air are sealed. Whether you use weather stripping tape or caulk, the key is to make sure that you find the gaps and fill them in.

Make Sure Your Skirting is Secure
It’s important no matter what season it is to make sure your skirting is secure around your mobile home. But when it’s time to ready your mobile home for Winter it should be a top priority. Not only does the skirting protect your pipes under your home, but it also keeps out any unwanted animals that might try to make their Winter home under your mobile home.

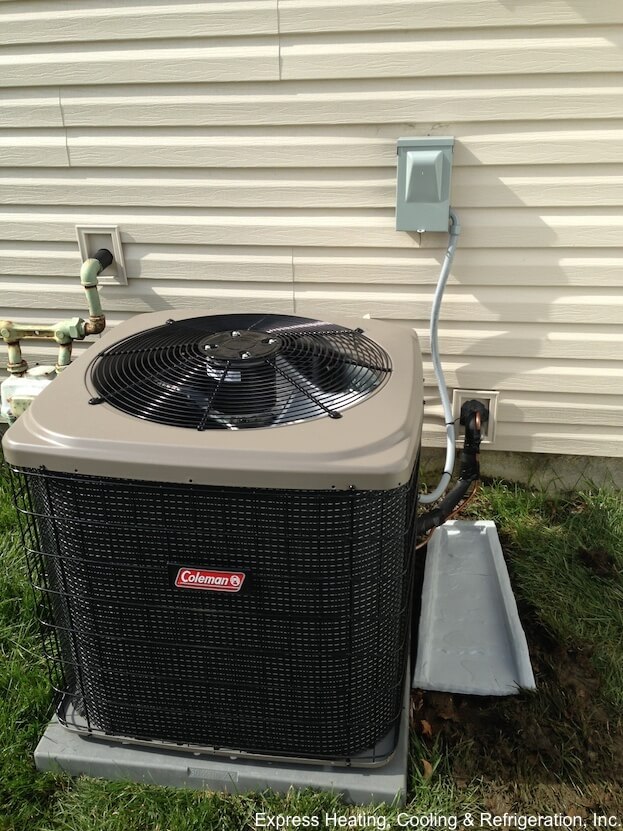
Give Your Heating System a Once Over
Whether you have a heat pump or a furnace for your Winter heating source, it’s important to make sure its ready for cold weather.
Besides making sure your filter is clean, the U.S. Department of Energy recommends the following:
If you use a gas furnace:
- Check the vents for blockages
- Ensure heat exchanger is in good condition
- Clean and inspect blower and its motor
- Tighten or replace faulty electrical connections or wiring
- Inspect burners and sensors
- Be sure belts are in good condition and replace if needed
- Ensure proper thermostat operation
- Oil and lubricate all moving components
- Replace air filter if needed
- Ensure all safety controls are working
- Inspect natural gas fuel lines for leaks
If you use a heat pump:
- Remove plant growth and clutter from around outside components
- Ensure that registers inside the home are clean and fins are straight
- Inspect blower and blower motor for proper operation
- Check ducts for leaks and damage and seal if needed
- Ensure coils are clean and in good working order
- Check for refrigerant levels and leaks
- Inspect electrical connections, tighten if needed
- Lubricate moving parts like motors
- Check belts and wear levels
- Ensure electrical control works properly
- Ensure proper thermostat operation

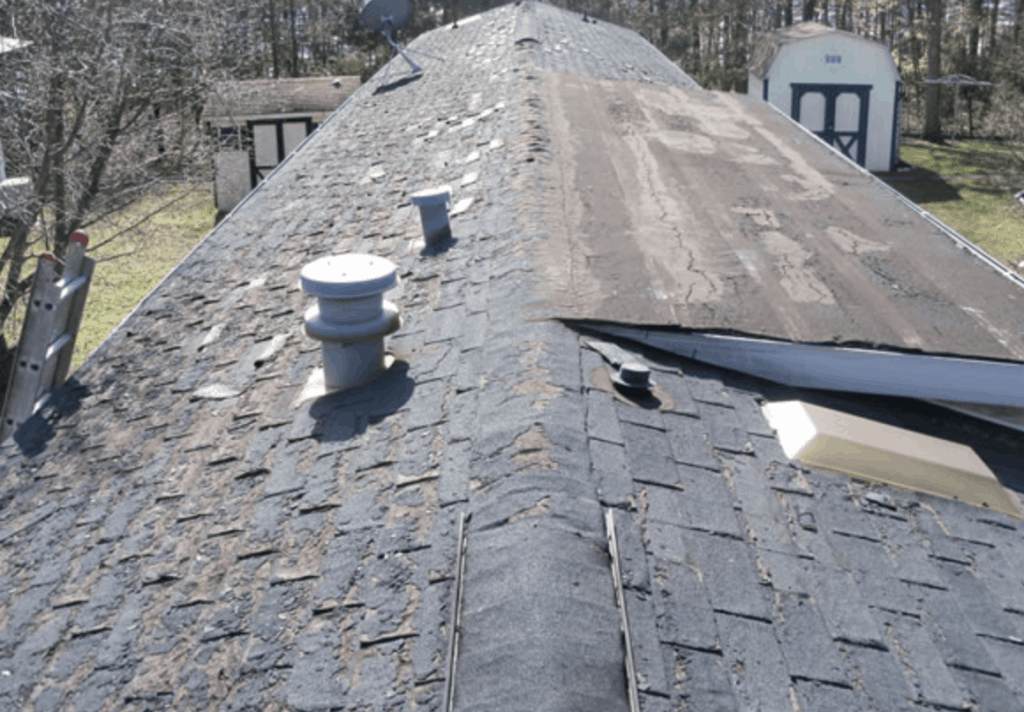
Inspect Your Roof
Before Winter, you or a professional should inspect your roof. You will want to check for any loose shingles, reapply sealant around any roof vents to ensure they don’t leak, clear off any debris, and if you have gutters make sure they are clear of leaves to allow for snow runoff.
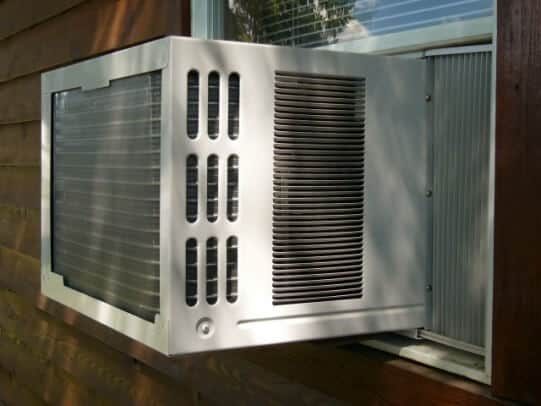
Cover or Remove Your Window AC
Unless the AC is really well insulated with the window, the whole thing’s going to be a cold spot in your home which is bad for your heating efficiency and expenses. So, the best thing to do is remove the window AC and to seal off the window for the winter. Come spring, you can easily just mount it up again.
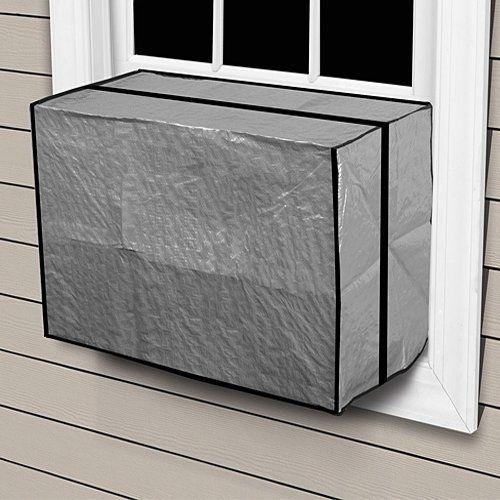
If you don’t feel like removing a whole AC unit and sealing off the window, the other good option is to seal a window air conditioner for the winter. This means both covering the outside body of the AC unit with a plastic bag to weatherize it and then covering it with a heavy fabric cover to protect it from the elements. Such covers are typically sold both online and in stores.
The next step would be to insulate the gaps between the AC unit and the window itself. Simple strips of firm foam insulation can do the trick, and it will easily boost the temperature in your home with a couple of degrees throughout the winter.
Have a tip we should add to our list to ready your mobile home for Winter? Comment below and we will share your suggestion with our readers!
As always, we thank you for reading Mobile Home Living.


I nf your mobile home has been brick or block underpinned, you should have air vents, roughly every 15 or 20 feet. Make sure to close your vents when is the cold temperatures set in! Just like you would on a regular stick built home, these are often black plastic they just slide one way to open and slide in opposite direction all the way to close the vent. Some of the fancier vents open and close automatically when the temperature gets below certain point. But most are manually opened and closed by hand with the left to right sliding action. For some reason I Really enjoy opening and closing my vents. I honestly look forward to opening my air vents in the springtime and closing the vents in the fall when it starts turning cold at night. I think it’s because it’s something so simple yet can help so much! This will help several ways, it’ll save you money because you won’t have all that cold wind blowing under your house hitting your air ducts So your heating bil should improve and your pipes will be better equipped to handle those cold nights and will be less likely to freeze, though you still need to leave the water dripping on nights under 32°, Fahrenheit.
It’s definitely worth investing in some custom interior storm windows if you have single pane windows. I’ve made them myself before using plexiglass and strips of weatherstripping foam with an adhesive back. You can also have someone local make you glass storm windows. Just make sure you have a good place to store them in the summer if you take them off to open the window for some fresh air. I insulate my single pane camper windows with Reflectix, and then either have a blanket or thermal insulated curtains or blinds. Put rugs or foam squares on the floor squares on the floor if you have a solid surface floor. Test your heating systems BEFORE you have to use them so you aren’t caught off guard on a cold winter day. Especially important in the winter to control your humidity so you don’t get mold or moisture build up. Keep air moving, put some moisture absorber containers and silica packets in closed off areas like closets and cabinets if you are having problems. Always have a back up heating source, especially if the power were to go out. Have emergency lighting, water, food, etc.